About this blog

My photo
Wales, United Kingdom
Documenting one couple's attempts to live a more self-sufficient life.

Monday, 26 January 2015

New shower

We have an old electric shower here. It's very feeble, but in summer it does provide our only source of running hot water; for anything else we have to boil the kettle. The long term plan has always been to replace it with one plumbed into the hot water system, but that rather depends on having a fully functioning hot water system, which depends on having solar panels to heat the water in the summer. In the winter we light the fire every day for heating, and that provides heat for the water, too.

The other day I had a shower and it seemed even feebler than usual. I had to turn the flow down to the most pathetic dribble to get the water anywhere near a comfortable temperature. I thought it was just because the incoming water is very cold, but Ian pointed out that it wasn't this bad when the outside temperature was -15°C, and concluded that there's something wrong with the shower. Since there was still some heat, we thought it most likely that one of two heating elements had burnt out. If we could replace that fairly cheaply, our electric shower could limp on a little longer, giving us time to plan a replacement. While I looked up replacement elements, Ian took the cover off the shower unit (after switching off the power at every possible point) to investigate. I heard a startled, Ugh! from the shower room. Was it full of water? I asked. No, mice!


Mice in the shower unit

Yes, that's right. There were mice in our shower fitting, snuggling up to the water heater. At least, presumably that's what they'd been up to when they were alive, which they weren't any more. This raised our hopes that the fault might be as simple as a chewed wire, but alas, there was no sign that the mice had done any damage before getting electrocuted.

In the meantime, I learnt that heating elements are not sold individually, but a replacement heater can assembly may be purchased... for £67.44. We could buy a new shower for not much more than that. OK then, it's not worth buying a replacement part for the old shower - perhaps now's the time to plumb one into the hot water system. This required decisions. The key question is how to get the water coming out at the right temperature. Trying to keep things as simple as possible, I thought that a manual mixer tap might do the job, as our hot water temperature is pretty stable. The alternative is a thermostatic mixer, but I'm not convinced by their reliability, and I assumed they'd be a lot more expensive. Ian looked to the internet to investigate the latter question, while I thought about what other information we might need.

Before abandoning the electric shower entirely, it would be nice to know that our system can supply enough hot water for a shower. It was designed to (by me), but not with much spare capacity, and we don't get the thermal store as hot as I'd originally expected to. Some testing would be necessary. Much as it pained us to take so much heat out of the store, it was the only way to get the answer.

Testing step 1: Run the shower at a desirable flow rate and see how long it takes to fill a bucket. Answer: 2 min. Step 2: Gather up enough buckets for fifteen minutes worth of water. Actually I only got seven; one was full of sloe wine, one was full of engine oil, and I don't know where the tenth is. Still, a fourteen-minute shower is close enough for testing purposes. Step 3: Run the shower at a desirable temperature and measure this with a thermometer. Answer: 39°C, which Ian cross-checked with advice online, and found to be much what everyone else says, which is reassuring. Step 4: Use the kitchen tap, which is a simple mixer tap, to fill the buckets, trying to maintain the same flow rate and temperature as we'd want from the shower.

There are two questions here: How easy is it to keep the temperature steady, and can the thermal store supply that temperature of water for the duration of a shower? The thermometers on the store at the start of the test read 60°C at the top and 40°C in the middle, which is somewhat lower than full, but quite typical in the morning after the heating's been on for a couple of hours. The good news is that the temperature held up quite well for the fourteen minute test. The bad news is that it was very difficult to maintain the temperature in the first five minutes. The hot tap may run at a steady temperature, but the pressure's all over the place, so I was constantly fiddling with the taps until it eventually settled down. That's no good. So much for a simple mixer tap.


Buckets of warm water. We left them in the kitchen so that as they cooled down, the heat would warm the house. It was also quite a good place to put a bowl of bread dough to rise.

Ian's research into thermostatic mixers wasn't very encouraging, either. They seem quite fussy about what inputs they require. In particular, he didn't think our system would be able to provide hot enough water - at least not consistently - for the things to work properly. Hmm, neither of the two options we were considering look very good.

On the subject of thermostatic mixers, we do have one in the system already. Ian's never been convinced that that's what it actually is, but after learning more about them he realised that it's probably just not doing anything most of the time, because the input water isn't hot enough. With the thermal store now hotter (the fire had been lit for some hours by this time), he measured the hot water temperature and found that it was 55°C. That's hotter than we'd ever want coming out of the tap. I reckon 43°C is about the hottest I'd want for doing the dishes, before I'd need to add cold to make it useable. That's not very much higher than we want for the shower. What if...?

What if we turn down the setting for household hot water to a temperature that's comfortable for showering? That way, we wouldn't need a mixer tap at all, either manual or thermostatic. It may seem a bit primitive to have no temperature control in the shower but really, we don't need the temperature to be variable, we just need it right. If the household supply can achieve that, why add anything else? The simplicity of this solution certainly appeals. We can always try it, and if it doesn't work well, upgrade later.

The next step was to plan the design and see what materials we already had available. We're not fussy about appearance - one day we'll make our bathroom nice, but that's a big job for sometime in the future, no point faffing about with buried pipework now. The plan was to insert a T joint into the hot pipe under the basin and take a pipe from there into the shower, attach a tap and fix it to the wall. The existing shower head has a standard screw fitting, so we can use that. We found a length of 15 mm pipe that had previously been connected to the old gas tank. If you watch the video in that link, at the end you'll see the man come over and tie a knot in the pipe. I had to cut that bit off. We also had a few short bits of 15 mm pipe, and various connectors.

The old gas pipe looked just about long enough, but until I'd bent it into shape, I couldn't be sure, so the next job was pipe bending. Ian was getting quite twitchy at this point as we didn't have much time before the shop shut (it being Sunday afternoon). I insisted that it wasn't worth going to the shop until we knew what we needed, and continued bending the pipe.


Pipe bending

It really was only just long enough to go over the shower screen and have one end low enough to clear the trap on the basin, and the other end low enough that the tap wouldn't hit the old shower unit (we're keeping that as backup. It's not good, but if the hot water runs out completely, it's better than nothing). Then we went and bought parts. All we needed were a tap and one elbow joint. I also bought a bag of olives - the sleeves that go inside the nut in a compression joint - because we have plenty of nuts and it would be really annoying to have to stop work for want of an olive. The total cost of parts was less than £10.

After that, and a tea break and chat to my dad (he called) it was just a matter of turning off the water then being brave and cutting into the pipework to attach all these bits. For some reason, our water wouldn't turn off completely, leaving it dripping. This is very annoying, but does provide an instant check for leaks.

I didn't finish connecting everything up until after dinner. I went round all the nuts, tightening them up and chasing the drips from joint to joint, until there was just one that was still leaking. I tightened further... the dripping increased. I went and slumped on the sofa in despair and Ian took over. He tried applying sealing gunk, but that didn't help, so he removed the offending pipework.


That would be the problem, right there.

The connector was cracked. No wonder it wouldn't stop leaking. Ian then went off and searched for more parts, and found another elbow that I'd missed earlier. Unfortunately I'd used the last of the PTFE tape on the previous joint and the gunk he'd already tried wasn't really the right stuff. And the joint was still dripping. He searched some more and found some very old jointing compound. It took a lot of scraping and stirring to recombine the solid and liquid parts, but eventually we had something that looked like it might be smeared on a screwthread. Ian did this bit, and put it all back together with the replacement elbow.


A hodgepodge of connectors under the basin

So far, no leaks! In the end, the pipework is even fairly neat...

... though perhaps less so at the shower end.


Yes, we did choose that tap.

So how is it, then? I had a shower this morning. I didn't really need one, but I had to test it, even though the thermal store was a bit on the cool side (we were too busy plumbing yesterday to pay full attention to the fire). The temperature, once the hot water came through, started at slightly hotter than I'd want but quickly dropped to slightly cooler. It wasn't uncomfortably cool, but didn't encourage lingering. That was OK, though, because the pressure was so much higher than I'm used to. I'm sure the flow rate was much higher than we used in the test, and not easy to turn down, but it was lovely! With that much water I can get clean quickly, so I don't need to spend fifteen minutes, and it's so much nicer.

We will monitor the situation, but so far this is a clear success. Of course, it does put the pressure on to get the solar panels finished before we stop lighting the fire in the spring.

Tuesday, 13 January 2015

Wintry things

Winter arrived in Devil's Bridge this morning, almost as abruptly as autumn arrived, back in August. We've had a few hard frosts, but mostly it's been pretty mild, then this morning it snowed....

... and very pretty it is too, though not so nice for birds.


A pair of bullfinches came to feed on dock seeds.

When I say the weather's been mild, it's still quite cold enough to have the heating on and as usual, we're struggling to keep the house warm. The other day I did a maintenance job that I should have done ages ago. I replaced the fire rope seals around the doors on the wood burning stove.

Until I started measuring how much I needed, I hadn't even noticed that the ash flap at the bottom also has a channel to fit rope into. It's not a very big job, though slightly bigger due to the fact that it was previously fixed with cement (it shouldn't be), so I had to chip all that out first.

We couldn't believe how much difference it made! We'd always thought our second hand stove was just old and leaky but in fact, with new seals in place, it's possible to close down the air flow so much that wood stops burning. Without the flow of cool (room temperature) air into the fire box, it gets a lot hotter and radiates far more heat into the room. We're also using less wood, as it doesn't burn up so quickly. A day after I replaced the rope, Ian investigated the air inlet control, which has never had any noticeable effect before. With the ash cleared out of the vent, it works just fine, so now we have an efficient, controllable stove. It's like having a new one! It's a salutary illustration of the importance of maintenance.

Now, I'm going to go and sit by the fire, but I'll leave you with one more picture of snow, because the sun came out briefly about an hour ago.

Sunday, 21 December 2014

The darkest time of the year (and a fireplace)

Take several months of financial stress, add seasonal depression, responsibility for a big, stressful event, a period of intense uncertainty (which isn't resolved yet, so I can't tell you about it) and on top of all that, a dead cat... well, it hasn't been the easiest autumn. There are good days and bad days.

On the good days, I've been working on the fireplace surround. This has been a ragged hole in the wall since I attacked it four years ago.

I've had some ideas about what to do here, but most of my ideas involved spending money, which we'd generally rather avoid, and is currently not an option for merely decorative projects. The part I was most certain of was the brick arch. It would be nice to get hold of some attractive bricks, but perhaps not entirely necessary. I started by searching the property for all the old bricks I could find. One was on the driveway, having been used as an alternative handbrake. Several were serving as a stand for the barbecue. Some were just lying around. Those you see in the photo above were the least scruffy/most similar to each other that I could find.

The next step was to clean the bricks as best I could without buying chemical cleaners (to be avoided for several reasons). Online advice suggested that dishwashing liquid might be worth a try, so I tried it, applied using brushes with both nylon and steel bristles. It didn't make much difference. My next attempt involved play dough. I made up a salt dough and pressed it onto the ends of the bricks, then baked them in a low oven until it was hard. The next day, I soaked it off, then scrubbed with dishwashing liquid again. I can't be entirely sure, but I think that quite a lot more soot came off the second time. Whether the play dough had anything to do with this, I have no idea.

Having selected my bricks, I still didn't know what to do with the edges of the fireplace. I'd quite like to leave the bricks bare, but as you can see, the brickwork is far from tidy. My cousin suggested brick slips - bricks made in thin tile shapes, including corner pieces, sold for applications just like this. It was a good suggestion, but.... money. Then a visiting friend suggested a wood surround. This is much more realistic as we have lots of old floorboards. I was sure I could find a couple of pieces that would suit. I even considered carving some decoration into them, but that would be quite a big project, not to be attempted before Christmas. In the meantime, I considered how to fix up a shelf above the fireplace.

I found the old shelf that had been there before, somewhat weathered now, but not necessarily any the worse for that. I was holding this up in position (it's just a little longer than the width of the arch - the ideal size), wondering what kind of brackets would be suitable, when Ian walked by and said, Ah, a mantlepiece! This comment set off a new train of thought. I'd been referring to the horizontal pieces of wood in my mind as a shelf, and shelves are typically supported by brackets. Mantlepieces, on the other hand, are often part of a fire surround, with supports that sometimes go right down to the floor. I wondered whether we might have any pieces of wood that I could use like that? Initially I was thinking of new cut timber that I might carve, but before long I lighted on the idea of using the leylandii trunks I got from cutting down the hedge. Quite a few of these have been turned into firewood, and some still have branches attached, but there were three trimmed and unburned. I selected the two longest and cut the ends straight across. Here they are in position, under the mantlepiece:


Leylandii trunks holding up mantlepiece and hiding scruffy brickwork

I'm quite pleased with this. They're currently held in place with bits of string - I'll fix them properly after Christmas. No, really, I will!

The bad days come with the rain. Not just the rain, but closed-in, up-in-the-clouds weather that blocks out light and warmth and joy for days on end. The air and the ground get saturated with water so that nothing's ever quite dry, and we get puddles in the store room.


Those orange dots at the top of the picture are squash. I'm having to keep a close eye on them so as to eat them up quickly as they start going mouldy.

The other day, some friends and I discussed what the point of Christmas is. We came up with quite a lot of points, and agreed that you can take your pick. My focus is to fend off the gloom and darkness of this time of year, and celebrate the return of the light. When my mood lifts sufficiently to get anything done, I'm focusing on Christmas. Today, I am mostly making sweets and - the reason I wanted the mantlepiece up before Christmas - I have decorations up.


Mouse ears and chocolate pigs


Evergreens and sparkly things around the fireplace

Tonight is both the solstice and the new moon, so it truly is the longest, darkest night of the year. After this, the light returns. Yuletide greetings to one and all!

Monday, 24 November 2014

Goodbye, Pebble

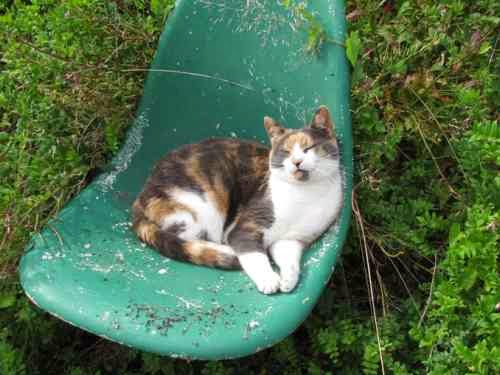
We went to visit Ian's parents in Devon last week, returning on Friday evening. Pebble greeted us at the door, had some dinner, then raced around like a mad thing for a while before settling on my lap. A little later, I got up to get our dinner and not long after that she started complaining. At first we thought it was just because we'd switched the heat off on her bed (seed propagator at other times of year) but it soon became obvious that she was in pain. We called the vet, monitored the situation for an hour or so, then decided she really did need medical attention urgently so arranged to meet a vet at the surgery. He couldn't give us a definite diagnosis until morning, but said that the symptoms suggested rat poison. We left her with him to do what he could for her, but by morning she was dead.

Today, we buried her in the garden, where I'm planning to plant an elder tree. She did love elderflowers.

Here are some memories of a beloved cat.

Sunday, 2 November 2014

Ugh

The thing I hate most about depression - apart from the sluggishness and not caring about anything - is that it makes me stupid. I can't concentrate, I get (even more) absent minded, I forget things. Then stuff like this happens:


Glass cover removed from solar panel when it was sunny, forgotten about, then blown over when it was windy.

Then I hate myself for being so stupid, and I just want to cry.

Saturday, 1 November 2014

Sauerkraut and other fermented things

This may make me sound a little odd, but I really like cabbage. Not when it's been boiled too long and served plain, a la school dinners, but steamed until just tender and served with a little acid of some kind - lemon juice, vinegar, apple sauce, and chutney are all good - it makes an excellent side vegetable. My favourite kind of cabbage is red, with the tightly-formed heads. I'm not sure whether it really tastes any different from white or green, but it's so pretty when it's cut.


Sliced red cabbage

It's hardly surprising that I should like sauerkraut, since this is essentially cabbage in acid, specifically lactic acid. Even better, from the point of view of making it, is that I don't even have to buy the acid myself, since, with a little encouragement, bacteria will make it for me. The process goes like this: I add a layer of finely sliced cabbage to a jar, sprinkle on a little salt, press down with a pestle, and repeat until the jar is full. There are no precise measurements involved, or indeed any measurements at all.

To reduce the chance of mould growing on the top, I weigh down the cabbage with (washed and boiled) beach pebbles, which I sprinkle with more salt then top up with water before closing with an air locked lid. This might sound like overkill, but I get a lot of mould growth. It's all very well saying, Just scrape off the mould and discard the top layer, but if you ferment in relatively small jars, as I do, that top layer can be quite a high proportion of the total.


Stones and extra salt

The other appeal of red cabbage is that the pigment is an indicator, so it displays the acidity. Here are two jars, one freshly filled, one after a couple of weeks of fermentation:


Sauerkraut, before and after. Such pretty colours!

As for the other fermented things, I've come to the conclusion that lactofermentation is not the best treatment for everything. It works well for cabbage, which is why this is a classic, and for unripe sloes, which is totally obscure (I haven't heard of anyone else trying it) but make a good alternative to olives. The important thing to bear in mind is that the fermentation process alters flavours in other ways than just adding acid. To my surprise, it completely destroyed the aniseed flavour of Alexanders. Wild garlic leaves work well, but the result is not a substitute for garlic, it's an entirely new flavour. Samphire kind-of worked, but the result was disappointing. I'll stick to vinegar for preserving this in future. Courgettes were successful, but I found that I don't really want to eat pickled courgette that often. Do you ferment things? Have you come across anything that works really well?

Overall, I've found that lactofermentation is a useful preservation method for some things, but it's not universal in its application. I still think it's magic, though.

Tuesday, 28 October 2014

It's that time of year again

With the rapidly shortening days around the equinox, my SAD hit me again. At least this year I noticed it quickly, instead of spending a month wondering what was wrong with me. On top of this, for the last week or so the weather has been miserable. The clouds surround us, blocking out the sunlight and filling the air with moisture. Everything is dark, cold and damp. This doesn't help. So, um, sorry for the recent lack of blog posts.

It hasn't all been bad. This morning we had a few hours of sunlight, which lifted my mood enough to put these together:


Flyers for our next (and last) gig

On Friday a friend of mine posted some pictures of mushrooms on facebook, wondering what they were, and sent me a private message with their location, in case I was interested. I couldn't be sure from the photos, but they did look like ceps, so I went to see, and...


Cep, with cat for scale

... they're huge! That's not a trick with perspective, that mushroom really was that big. Unfortunately, it was also rather full of maggots, but they weren't all. My drying rack is now full of sliced mushroom - if only the humidity was a little less than 100%

I made some progress with the solar panels, then stopped when it got difficult. I'll tell you about that when I get back to it. Right now, the need to creosote woodwork does not sit well with the presence of mushrooms trying to dry in the same space.

I have harvested the sugar beet - a smallish barrow load (I haven't weighed them yet). This doesn't feel terribly positive right now, because the next task is to clean them.


Filthy sugar beet. They're not all this big.

One positive side of all this damp weather is that when the clouds do break, we often get very nice rainbows.

Friday, 26 September 2014

Mushroom paté

Having dried some mushrooms to a crisp for storage...


Jars of dried mushrooms. Ian says the chanterelles look like small, dried octopi

... I got to wondering what I might do with them in this state, apart from rehydrating and adding to stews and suchlike. As a first step, I tried powdering them, potentially for using as stock. It turns out that a pestle and mortar makes short work of this job. I haven't yet tried it, but I imagine I could make a pretty good smooth mushroom sauce from this powder.

Today, I had another idea. I had an open tub of mascarpone cheese in the fridge, which I'm quite partial to at the best of times. I took a large dollop of that and mixed it with my powdered mushrooms - about half and half cep and chanterelle - and, um, that was it. It took quite a bit of mixing, and the result is a fairly firm paté, as the dried mushrooms absorb moisture from the cheese.


Mushroom paté

Wow, this is sublime! Of course, the crucial part is finding the right mushrooms in the first place (and note that this is only suitable for mushrooms that can be eaten raw), but once they've got as far as the storage jar, this is a very easy treat. I'm counting this one as a success.

Friday, 19 September 2014

Mouli review

I spend quite a lot of my time pushing stewed fruit through a sieve, especially at this time of year, when there's so much fruit in the hedgerows. It's very hard work and I've broken several sieves in the process, so as the most recent victim parted company from its handle, I wondered whether it might be time to invest in something that's actually designed for the job of pureeing fruit whilst leaving skin and stones behind.

Discussion on the selfsufficientish forum had alerted me to two possible options, a mouli and a passata maker, originating in France and Italy respectively, the latter being designed for processing tomatoes. I sought advice on which would be best, and found that our local cookshop had a reasonably priced mouli for sale. I discussed it with the shopkeeper, and neither of us thought the screen fine enough to sieve out blackberry pips, so I went back to the forum to ask and, reassured, returned and bought the mouli. I do love that shop - I wish I could afford to buy kitchen equipment for often, but perhaps it's just as well I can't, for the sake of my cupboard space.

Anyway, here's the new gadget:


Mouli, in pieces

It comes apart into three pieces, or five if you count the spare screens with different sized holes. There's a bowl part into which the to-be-pureed food goes. In the bottom of this is a disk/screen with holes in, and this is held in place by a third piece, which fits into the bowl and includes a spring to hold the screen down, a blade (not sharp) to push the food against the screen, and a handle to operate it. This might be clearer if you see it in action:


Stewed damsons in the mouli. I chose the medium screen for this.

One feature of this particular mouli is that it doesn't have legs on the bottom for standing it over a bowl, just hooks at the top. This means that if fitted over a bowl, there isn't much room for the puree to come out at the bottom. Luckily, it fits very nicely over a ten litre bucket, though it is a little difficult to find a comfortable working height.

My first attempt was stewed damsons, as shown in the picture above. The stones are relatively large, which I find difficult to deal with in a sieve. Recipes often advise taking the stones out before pushing it through a sieve, but that takes ages. So how did the mouli handle it? Brilliantly! This is definitely the right tool for the job. It's still a manual tool, so it's not effortless, but it's a lot easier than the sieve, and it does the job very effectively. I found that the handle needs turning in both directions; clockwise to push the mush against the screen, then anticlockwise to lift it away again. It's also necessary to use a spoon to push stuff down to the bottom, especially as it gets drier.

My next attempt was mashed potato, as I've heard people say how much nicer it is made with a mouli (I'm skeptical). Optimistically, I wondered whether I might be able to boil small potatoes with their skins on then have the mouli extract the skins as it mashes them. No, it doesn't. Oh well, it was worth a try. I also found that, for a meal-sized quantity, transferring the potato to a metal mouli, and then into another container, cooled it a lot. On the other hand, if you have a quantity of blighted potatoes that you want to mash in large quantities to freeze, it's just the thing.


Mouli'd potatoes, through the largest screen

For the third test, another batch of hedgerow fruit for fruit leather, this time crab apple and blackberry. Can a mouli really sieve out blackberry pips, even using the finest screen?


Fruit leather, drying on the rack in the conservatory

Yes. Yes, it can. At least, I haven't found a pip in the pulp I've sampled so far.

EDIT: Now the leather is dry, it's clear that a few pips got through, but I still think it's not bad.


A few blackberry pips got through

The only problem I've come up against is that this gadget processes such large quantities (the one I bought is big; smaller ones are available) that I don't have enough baking sheets to spread the pulp out on.

As you can probably tell, I'm very pleased with my new gadget. It takes more washing up than a sieve, but with just three parts it's not too bad, and it more than makes up for it in labour saved. It might even make it worthwhile to pick haws, as I'm curious to try hawthorn ketchup.

Thursday, 11 September 2014

Spud harvest

At some point when I was looking the other way, my potatoes got blight.


The dead stems of the King Edwards are there, in amongst the weeds, if you look closely enough

We had a spell of cold, wet weather, which probably encouraged it, and I don't suppose those weeds helped, either.

Still, all is not lost. I dug up three bucket-fulls of spuds. I haven't weighed them all yet to see how this compares with previous years, but I think it's quite a bit down. Still, it's a lot to process all in one go. Why bother processing? I usually just put them in sacks in the store room. You see, the thing with blight is that if it's infected the tubers - and with that rain it's sure to have washed onto them - they rot in storage. I found a few rotten tubers in the ground, but most were fine. The only sign of blight was tiny brown spots, in some cases only visible when I peeled the potatoes. They're perfectly good for eating now, just not for storing.


You can't see the blight, but I know it's in there

If I want these to last, I need to do something with them. I have plenty of freezer space, so that's the obvious option, but raw potatoes don't freeze well. That it, they freeze just fine, but then go black and slimy when you thaw them, which is less than appetizing. They need to be at least par-boiled if they're to be frozen and thawed to an edible state. I thought I'd go a little further. If I'm bothering to wash, peel, chop and par-boil three buckets of spuds, I could put in just a little more effort so that I have something ready to put straight in the oven (or possibly microwave) when it comes out of the freezer.

We usually eat potatoes in three forms: Mashed, roasted, or chips (fries). I've been making frozen chips for several years, having figured out how to do it in response to a previous blight incident. I hear that mashed potatoes freeze well, so I boiled them up in large batches and deployed a new kitchen gadget for mashing them, of which more in another post. As for roasties, well if Aunt Bessie can do it, surely I can too? I usually par-boil them then roast in oil in the oven. For freezing, I par-boiled then applied the hot oil in the frying pan.


Trial batch of to-be-frozen roast potatoes

I tested the theory with a small batch of King Edwards, which cooked from frozen in about half an hour and were pretty good - perhaps a little dry, but we usually have gravy with a roast dinner, so that's not really a problem. I'm not sure whether the Desiree will be as good - they seemed less crisp when cool, as they went into the freezer, but hopefully they'll crisp up again when cooked.

This is a work in progress. I tried bracing myself to do the whole lot at once, but it seems that I don't have sufficient stamina for the job. With all that hot oil and fat, it takes a lot of concentration. This is tiring! Also, with the harvest moon this week, I've been harvesting other veg too. The stock of frozen peas and green beans is increasing, and I cut my first ever cob of sweetcorn.


First sweetcorn

Hm, not quite what I'd hoped for, but better than it might have been, and it was tasty.