About this blog

My photo
Wales, United Kingdom
Documenting one couple's attempts to live a more self-sufficient life.
Showing posts with label Harvesting. Show all posts

Monday, 1 August 2016

Gŵyl Awst Hapus / Happy Lammas

Lammas, also known as Lughnasadh or in Welsh, Gŵyl Awst*, is a festival that hasn't been adopted into our modern calendar, though we do have the August bank holiday at the end of the month. It's the first of three harvest festivals, traditionally the wheat harvest.

I don't have wheat or any other grain, but I do have that modern import from the new world, potatoes, and I started harvesting them a few days ago. They're a bit small, really, but I have maincrop potatoes for growing big. I will eat these as they are, and all the better for it.


Today's harvest

---

* Literally, August festival

Thursday, 11 September 2014

Spud harvest

At some point when I was looking the other way, my potatoes got blight.


The dead stems of the King Edwards are there, in amongst the weeds, if you look closely enough

We had a spell of cold, wet weather, which probably encouraged it, and I don't suppose those weeds helped, either.

Still, all is not lost. I dug up three bucket-fulls of spuds. I haven't weighed them all yet to see how this compares with previous years, but I think it's quite a bit down. Still, it's a lot to process all in one go. Why bother processing? I usually just put them in sacks in the store room. You see, the thing with blight is that if it's infected the tubers - and with that rain it's sure to have washed onto them - they rot in storage. I found a few rotten tubers in the ground, but most were fine. The only sign of blight was tiny brown spots, in some cases only visible when I peeled the potatoes. They're perfectly good for eating now, just not for storing.


You can't see the blight, but I know it's in there

If I want these to last, I need to do something with them. I have plenty of freezer space, so that's the obvious option, but raw potatoes don't freeze well. That it, they freeze just fine, but then go black and slimy when you thaw them, which is less than appetizing. They need to be at least par-boiled if they're to be frozen and thawed to an edible state. I thought I'd go a little further. If I'm bothering to wash, peel, chop and par-boil three buckets of spuds, I could put in just a little more effort so that I have something ready to put straight in the oven (or possibly microwave) when it comes out of the freezer.

We usually eat potatoes in three forms: Mashed, roasted, or chips (fries). I've been making frozen chips for several years, having figured out how to do it in response to a previous blight incident. I hear that mashed potatoes freeze well, so I boiled them up in large batches and deployed a new kitchen gadget for mashing them, of which more in another post. As for roasties, well if Aunt Bessie can do it, surely I can too? I usually par-boil them then roast in oil in the oven. For freezing, I par-boiled then applied the hot oil in the frying pan.


Trial batch of to-be-frozen roast potatoes

I tested the theory with a small batch of King Edwards, which cooked from frozen in about half an hour and were pretty good - perhaps a little dry, but we usually have gravy with a roast dinner, so that's not really a problem. I'm not sure whether the Desiree will be as good - they seemed less crisp when cool, as they went into the freezer, but hopefully they'll crisp up again when cooked.

This is a work in progress. I tried bracing myself to do the whole lot at once, but it seems that I don't have sufficient stamina for the job. With all that hot oil and fat, it takes a lot of concentration. This is tiring! Also, with the harvest moon this week, I've been harvesting other veg too. The stock of frozen peas and green beans is increasing, and I cut my first ever cob of sweetcorn.


First sweetcorn

Hm, not quite what I'd hoped for, but better than it might have been, and it was tasty.

Sunday, 20 July 2014

Parsnip fruit

I've kept four of last year's parsnips in the ground to produce seeds for next year. They've grown big and flowered, and mostly keep falling over when it's windy because the ground's too soft.


Parsnip plants leaning on each other, as I try to keep them upright

After the flowers and before the seeds, we have little green fruit.


Parsnip fruit

Since the seeds have an interesting flavour - sort of spicy, aniseedy - I tried one of the fruit. Wow! They're the same, but much stronger. There are plenty to spare, so I thought I might do something with some of them, but what? I considered crystallizing, as I did with the similar-tasting (and related) Alexanders, but I can't really be bothered. Instead, I went for the lazy option:


Parsnip fruit in vodka

I stripped a few heads and put the fruit in vodka. If I added sugar, I imagine this could make a pretty good liqueur, but I'm not adding it yet. Firstly, it would probably reduce the effectiveness of flavour extraction, and secondly, this might go well with lemonade, in which case sugar would be unnecessary, and possibly excessive. I can always add it at time of drinking if I want to.

Monday, 14 July 2014

Blackcurrant cordial

OK, this took me a little longer to get round to as it wasn't just a matter of editing my previous post with the quantity of sugar used. Top tip: If your method of separating juice from fruit pulp involves hanging a jelly bag up by a piece of string, maybe think twice about processing eleven pounds of fruit in one go.


There was a bag of stewed blackcurrants hanging from this string before it broke

There was a lot of cleaning up to do after that. There were even splashes of blackcurrant juice on the ceiling.

At this point I remembered that I do actually have a small wine press in a cupboard in the store room. Although missing a tube to convey juice into a container, it does have one very useful feature: A splash guard. You might well ask why I didn't use this in the first place. So might I.


A much tidier method of extracting juice from blackcurrants

I can't tell you how much juice I extracted from my 11 lb 4 oz of fruit because I didn't measure it before I added the sugar. I stirred in 1 kg sugar, which tasted about right, then bottled it. The final count comes to 3 ½ litres of cordial, most of which is now in the freezer, because I don't add enough sugar to act as a preservative.

Speaking of sugar, and because we were talking about the anti sugar campaign recently, I thought I'd work out the sugar content per drink. It's a fairly strong cordial, so a suitable dilution is about one in ten, making a total of 35 litres of made up drink. One drink is about 250 ml, so that's 140 drinks in total. One kilo of sugar divided by 140 drinks is 7.1 g added sugar per drink. Blackcurrants contain about 6% sugar so... oh, I'm going to have to convert units to do this bit... 11 lb 4 oz is 5.1 kg, 6% of 5.1 kg is 307 g, divided by 140 drinks, is 2.2 g per drink. If I managed to extract all the sugar from the currents, that's a total of 9.3 g sugar per drink, or 3.7 g per 100g. I include that last measure for comparison with a recent survey of commercial soft drinks.

Thursday, 10 July 2014

Blackcurrant harvest; wine and cordial

The blackcurrant bushes have done me proud yet again.


This is not all of the blackcurrants, oh no.

I can take no credit for this. The bushes were here before we arrived and I've done nothing to them apart from harvest the ever increasing crop of big, dark, luscious fruit. So far this year I have used almost 6 lb for wine and over 11 lb for cordial, and there are still more currants on the bushes.

For the record (my record, that is - last year's blackcurrant wine is a bit rough, but I didn't take good notes, so I'm not sure why. I suspect I left it in the bucket too long), I made wine as follows: 3 lb 4 oz of currants picked on Wednesday 2nd July. I ran out of time to pick more, so started the wine then. Currants into bucket, followed by boiling water and 1 lb sugar. Currants mashed with potato masher. Cold water added up to somewhat less than a gallon, then yeast leftover from elderflower champagne, which went everywhere because I inverted the bottle a few times, to stir up the yeast from the bottom. That got going nicely, then on Friday I picked another 2 lb 11 oz of currants, making 5 lb 15 oz in total. I added these to the bucket and mashed. They didn't get the sterilizing effect of the boiling water because the yeast was already in the bucket, so I just had to hope that the yeast was strong enough by that time to smother anything else. More sugar added up to 4 lb in total. Actually, I can't remember how much I added the first time, just the total, but I can remember that I didn't have enough white granulated, so this included some icing sugar and some light brown sugar too. Mash again and add water up to about 2 gallons. On Monday, i.e. after an average of four days, I transferred the liquid to sterilized demijohns using the two jug method.


The two jug method. Yes, it's messy.

This method consists of scooping liquid out of the bucket with one jug then straining through a sieve into the other jug, from which it is poured into the demijohns. Here they are full, after some tidying up:


I do love the sight of demijohns full of wine-in-the-making

These stayed in the kitchen bubbling for a few days before I took them down to the cooler, darker store room.

As for the cordial, I picked the currants for that today. I spent a couple of hours picking 8 lb currants this afternoon, then it was time to come in and get dinner. I put those in the jamming kettle with a very little water, and brought to a low simmer. I left these on a very low heat during dinner, to evaporate some of the water. After dinner, I went out to pick some more (still plenty of daylight!) and discovered how much faster I can pick when the air is thick with tiny creatures that all want to suck my blood. It did take a lot longer when I got them indoors, though, picking out all the stalks, leaves and snail poo, before I added those to the pan as well. The whole lot's still simmering gently as I write this. The next step is to separate juice from pulp, and I'm wondering whether the bowl I usually use will be big enough for all that juice. Tomorrow I'll add sugar, and edit this post to record how much.

Thursday, 13 March 2014

Too many parsnips

I wouldn't have thought that such a thing was possible, but here we are in mid March, I have lots of parsnips still in the ground and they're all growing like crazy. At least, that was the situation a few days ago. Growing parsnips are not going to store for long, even if I lift them all and try various tricks I've read about, such as removing all the little roots, cutting the tops off and dipping the cut ends in wood ash (gives you a couple of weeks' storage, apparently). I needed to do something with these.


Just over 3 lb of parsnips

Of course, I could make a big batch of parsnip soup and freeze it, but it's getting to the time of year when I don't fancy thick, warming soups, and I suspect there might be quite a lot of it still there by the time I'm harvesting next year's parsnips. Besides, I had an idea...

I enjoy my home-brewing, but it bothers me a little that the main ingredient - sugar - is not something I've produced myself. What I'm doing is essentially buying sugar (either refined white or malt extract) to ferment, then adding foraged flavourings. However, parsnips are quite sweet and I've heard that parsnip wine can be pretty good. I wondered whether I might be able to brew a drink purely from the sugars in parsnips.

Estimates for the sugar concentration in parsnips range from 5% to 10% and I could reasonably hope they'd be at the upper end of that at this time of year. On the other hand, I probably wouldn't be able to extract it all, so that would bring it down a bit. A rule of thumb for potential alcohol content is that 1 lb of sugar gives 1% of alcohol in a 5 (UK) gallon batch. For my 3 lb parsnips, an upper estimate would be almost a third of a pound of sugar, so in one gallon that would be 5/3... about 1 ½%. You're not going to get drunk on that, but maybe enough to be worth a go. I subsequently found more parsnips - several monsters that I'd allowed to run to see last summer - which doubled the quantity, so I could be looking at up to about 3%. That would be good, but is probably very optimistic, given the likely inefficiency of extraction.

I looked up various sources of information on how to process the parsnips. Wine recipes recommended cooking fairly briefly, so the veg doesn't start to disintegrate and distribute tiny particles of parsnip throughout the liquid. Descriptions of how sugar beet is processed include finely chopped beet being passed through hot water... hm, hot doesn't sound like boiling, I wonder whether heating at a lower temperature might be the answer?

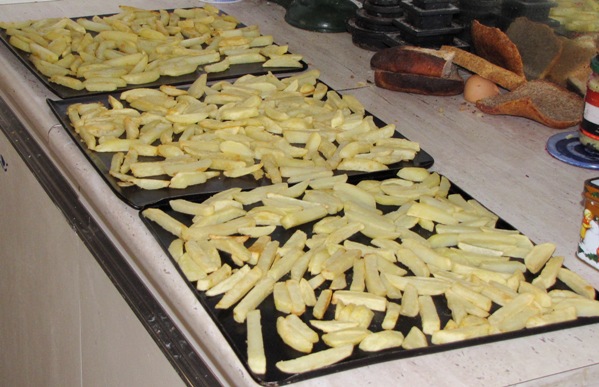
I sliced my parsnips fairly thinly, covered with water and brought to the boil, then reduced the heat to barely simmering, which I kept it at for about an hour. Sure enough, the parsnips were in no state to mash at the end of it, and the liquid tasted distinctly sweet. I strained the liquid off, hung the veg up in a jelly bag, then decided that was a waste of time and put it in the press instead. The strained liquid was about half a gallon, and I got another 2 ½ pints from the pressing, which I then brought back to the boil to sterilize (easier than sterilizing the press), which probably evaporated some off, so about ¾ gallon in total.

There were a few things I did for flavouring. First, I put a few of the parsnip slices in the oven and dry roasted them to caramelize some of the sugars, then added these to the pan. Secondly, I took another ingredient that makes a popular foragers' ale - nettles - and boiled up some of those separately. This allowed me to check whether the flavours work together (they do) before adding the nettle tea to the parsnip liquor. Nettles are only just appearing here, so I didn't get very many - about half a colander full. A few more would probably be better. Ginger is often added to nettle ale, and parsnip seeds, of which I have many, have a somewhat similar flavour, so I threw in a teaspoonful of those. I didn't think of that until near the end of processing, so they might have no impact on the flavour at all.

When the liquid cooled, I attempted to take a hydrometer reading, which was quite tricky as I don't have a proper flask and it kept sticking to the side of the bottle I was using. I think it read around 2% potential alcohol, which is about what I'd expect from the calculations.

The yeast is now doing its thing and the liquid is bubbling convincingly. My next decision is what to do about bottling. Usually, I'd wait for the primary fermentation to finish, then add a little sugar to each bottle to condition the beer - i.e. provide fuel for secondary fermentation so the beer's fizzy. However, the point of this experiment is to make a drink without using bought sugar, so I'd rather not do that. In the meantime, I have found another monster parsnip root, which might be the answer...

Monday, 14 October 2013

Tomato report

After a couple of disappointing years, I was determined to make a good go of growing tomatoes before giving up on them as needing more sunshine than we're ever likely to see in this part of Wales. As luck would have it, we had the best summer anyone can remember, so I had the best chance possible of getting a good crop.

I started my seeds off early on the home-made heated propagator. The seedlings came on nicely and I pricked them out into small pots of richer compost.

I may have been a little late getting them into their final pots/bags...

... but even so, I felt I was doing reasonably well at tending to their needs. After that I fed them weekly and carefully pinched out side shoots (OK I may have missed a few, but I got most of them) and my tomatoes grew well.


My tomato plants in mid July

On the first weekend in August, we attended a local agricultural and horticultural show. There, I saw fresh, ripe tomatoes. But how? Though my plants were growing well, they'd only just started flowering. I couldn't see how I could possibly get fruit off them by the end of July.

I pondered this a while and concluded that the secret must be the variety. I hadn't given much thought to this beyond choosing varieties that I wanted to eat (and by the way, seeds saved from Roma tomatoes do NOT come true) or accepting generous gifts from those with spare seeds.

A quick perusal of the Real Seed Catalogue reinforced my theory, as they specialise in varieties with short growing seasons, for precisely that reason. I know where I'll be buying seeds from next year!

In the meantime, all is not lost. My plants grew large and set quite a lot of fruit, and would have given me more had the season been longer.


In early September

As the weather got cooler I kept the door closed for more of the time and inevitably mould took hold (my friend Gill tells me this is botrytis and can be cut out if caught early enough). Fearful of the whole crop getting infected, I decided to harvest it all at once.

Some of the fruit were red...

... though most were still green, but I'd read that there comes a point when the fruit is sealed off from the plant and will continue to ripen whether attached or not. What they need is warmth. I sorted my tomatoes into two baskets - at least a bit orange, which went to the kitchen for using soon, and definitely green, which went into the spare room out of the way.

They've since been brought into the sitting room where it's warmer, though Pebble did object that they were on her chair.

Sure enough, the green tomatoes have been ripening and taste better than the crop I grew in my first year. Gill ripened hers indoors last year very successfully and predicts that we'll be eating home-grown tomatoes at Christmas, though we both agree that we'd rather have them in the summer.

Tuesday, 10 September 2013

Potato harvest part one

I've written more about wild foods than cultivated ones this year, but the garden has been ticking over. In spite of an encouraging start, my seed-grown potatoes came to nothing, sadly. The young plants just weren't tough enough at the time I planted them out and either died in the cold, dry weather or got eaten by slugs. It was probably slugs - they're usually to blame.

However, my conventional tuber-grown crop has done very well. I've been harvesting them for some time, and noticed last week that some of the leaves are yellowing, meaning there's no point leaving them in the ground any longer as they've done all the growing they're going to do this year. Time to dig!

I tried a few different varieties this year, so I have...


King Edwards - a reliable old favourite


I think these are Charlottes...


... and these Sharpes Express, but they might be the other way round


I've left most of the Desiree, but dug up a few by mistake...


... and a few more

The rest of the Desiree plants are still looking green and healthy, so I'll leave them to grow a little longer before digging those up. Most of the spuds are going into storage the traditional way (I even found the sacks!) but I used up a jar of tallow to make...


Chips!

Three trays of chips are as many as I can make at one time, because that's how many trays I have. I actually made five trays-full altogether, and these are now in the freezer.

Wednesday, 21 August 2013

Experiments with lacto-fermentation

I'm fascinated by traditional methods of food preservation, from pre-freezer days. I grew up thinking* that winter food was all dried, or heavily salted, or both, and pretty grim in any case. As I've learnt more, I've come to appreciate that it probably wasn't grim at all, and in some cases preservation actually enhances food. Alcohol is an obvious, if debatable, example, and there's another kind of fermentation that's been marginal for many years, but may now be making a comeback.

In the same way that yeast converts sugars into alcohol, lactobacilli bacteria convert sugars into lactic acid, which then preserves the food. After an era of, Kill all the microbes! we're now more familiar with the idea that some bacteria are friendly and are increasingly eating foods such as live yoghurt and lacto-fermented live pickles. Indeed, many health claims are made for these foods. I can't be bothered to investigate these claims thoroughly, but even if these pickles are no better for us than vinegar-based pickles I still think they're worth making. After all, if I can get the acid from fermentation then I don't have to buy it!

In spite of my interest in this topic, I've never had much call to try it before now, as I've never managed to grow anything resembling a glut of vegetables. This year, though, I have my neighbour's courgettes at the same time as French beans and broad beans in my own garden. I don't think either courgettes or French beans are particularly good frozen, so I decided to try fermenting some of each of them, leaving the broad beans to eat fresh. This gave me the perfect excuse to buy a couple of Kilner jars that I happened to spot in the supermarket.

I won't go into detail - you can find plenty of information online if you look for it - but I found this article helpful. In particular, the information about using blackcurrant leaves as the inoculant - the way of introducing the right bacteria - was valuable. I have blackcurrant leaves! I kept my recipes simple, with fairly small quantities of salt - probably a heaped teaspoonful per half-litre jar - and minimal spices. For the courgettes I added hogweed seeds (recently discovered, and hence my current favourite spice) whilst the beans got just salt and blackcurrant leaves. I sprinkled salt and pressed the veg down in the jars as I filled them, which released almost enough liquid to cover the veg. There were still bits sticking out of the top, so I topped up with a little tap water (ignoring advice about avoiding chlorinated water. I've just dissolved sodium chloride in it, for goodness sake! I'm sure a little more chlorine won't hurt.)


Jars of fermenting veg

I did the courgettes on one day and the beans on the next. As you can see in the photo, there were already bubbles rising in the courgette jar by the time I had the beans packed. Fermentation is happening! They'll sit in my kitchen for a few days with the lids on loosely (to let the gas escape) before going down to the cooler, darker store room. I'm not sure how long I'll need to leave the lids loose - I think I'll be monitoring closely for some time. I understand that these can be eaten in a few days, but that the flavour continues to develop for several months after that. I think I'll leave them a while - the point is, after all, to preserve veg while there's plenty available - and let you know when my patience (or fresh veg) runs out. In the meantime, aren't they pretty?


---

* That strikes me as a curious fact about my childhood. How many people grow up with notions about how food was preserved in the olden days?

Translations for Americans: Courgettes = Zucchini, Broad beans = Fava beans, Kilner jars = Mason jars. At least two of these are probably obvious from the photos.

Monday, 21 January 2013

Peas in our time?

The time in question being the middle of winter.

At about the time I was accepting that I couldn't manage the garden last summer, I stuck a few peas in a pot. Even if I hadn't planted enough for a proper crop, maybe a few late peas in a pot could be brought indoors when the weather got cold, and perhaps produce a small bonus crop in the winter.

Sure enough, the peas came up. I moved the pot into the conservatory when frosts threatened and I even watered it occasionally. In due course, they produced flowers and even a few pods.


Peas in the conservatory. That's freecycled insulation in the background.

Unfortunately, that's as far as they got. Today I gave up waiting for those pods to fatten up and picked a handful.


This is about as good as it got

I'm not sure whether it was the cold, lack of light, lack of water, or insufficient nutrients in the soil, but the answer would seem to be no, we cannot have peas in our time.

Thursday, 26 July 2012

Solar dehydrator - Mark 1

I picked a second harvest of blackcurrants the other day. I got three and half pounds and my neighbour got a couple of pounds as well, and there are still more ripening on the bush - it's a good year for blackcurrants. I stewed mine with a little water and strained the juice overnight to make cordial (with sugar added to taste, made about a litre). I then squeezed the bag to get more juice out - the murkier pressing - and made sorbet out of that (dilute and add sugar to taste. Freeze, but take out and stir at intervals. It still needs warming a bit before it's soft enough to serve, but if you don't stir it you just get an ice lolly, which is another option).

Finally, I pressed the remaining sludge through a sieve, leaving behind just the pips and skins, and sludge that I hadn't the energy to push through (this is very hard work). Again adding sugar to taste, this thick sludge can be dried to make fruit leather. As blackcurrants have a very strong flavour, I would have preferred to mix them with something bland like haws, but they're not ripe yet. I think I can live with intensely flavoured fruity snacks. Thick sludge was duly spread out in thin layers on baking sheets.

When I've made fruit leather before, I've dried it in the oven. As we have the novelty of actual sunshine here at the moment - and it's hot! Getting on for 30°C! (OK I know that's pretty cool by American standards, but it's unheard of in Wales) - I thought I'd try the sun dried approach. I started by laying the trays out on the garden table, which is perforated metal, so good for warm air flow around the trays. To increase the chances of actual drying happening, and because I've been thinking about solar dehydrators recently, I decided to construct such a device to help things along.

So... solar dehydrator step 1: Choose something dark coloured and non-insulating to serve as a collector. This is the bit that heats up when it sits in the sun. I picked roof slates as we have lots sitting around. The rigidity is handy, as they need propping up at a suitable angle to face the sun. I used bits of old brick for this, as we also have a lot of these sitting around.


Slates propped up on bits of brick. High tech stuff, this.

The next step is to set up a sheet of glass or plastic over the collector to make a little greenhouse. There should be a gap between the two to allow air to flow from the bottom to the top. I had a broken piece of greenhouse glass to hand, and found a bit of car in the garage (it wasn't attached to a car at the time, I promise!) that looked good for a spacer/ seal for the sides.


Glass resting on piece of rubber. This also keeps the glass off the ground, allowing air to get in at the bottom.

Once I'd set up my collector, I just needed some way of directing the air from the top of it towards the table with the trays of fruit sludge. I also thought that protecting the fruit from flies might be a good idea. I took the fabric part of a tent (yes, that was just lying around, too) and draped it round the table and collector, with the insect net supported by some garden wire (which was tidily put away in the greenhouse). I'm not sure I did a very good job of this.


There are three trays of fruit pulp in there somewhere

The idea was to catch the hot air emerging from the top of the collector and send it in the direction of the table. I did want to take the temperature of various parts of the set-up but the only thermometer I could find (pinched from the central heating system) was very slow to react, and we were going out, so I just left it.

Several hours later...


Tada!

We have actual, dried fruit leather. I didn't really believe it would work. Of course, if I was being scientific about it, I'd have left one tray out in the open as a control condition, to see whether my roof-slate-and-tent setup made any difference at all, but I didn't. I just wanted to give my fruit the best chance of drying, so now I have no idea whether this works as a dehydrator, but I do have a tin full of blackcurrant fruit leather stashed away for the winter.

Wednesday, 24 August 2011

First harvests: Carrots, runner beans and tomato

I've been a bit lax in my updates (as if you were interested!) on garden produce. I think once the excitement of getting any food from the garden wore off, I no longer felt compelled to tell you every time I picked something new.

I first dug up carrots three weeks ago:


First carrots

They're a bit short, in fact some of them are very short, so I need quite a few for each meal. They also have some damage which I think is caused by the dreaded carrot root fly. It's not catastrophic - if I cut the damaged bits out there's still plenty of edible root - but it does reduce the yield somewhat. I'm a bit disappointed with the flavour, too. I'm sure carrots of my childhood were deliciously sweet when pulled straight from the ground, but these are slightly bitter, just like supermarket carrots.

The runner beans are just getting big enough to harvest; I picked the first ones a few days ago.


First runner beans

There are no disappointments here: No sign of pest damage (yet) and they're just as delicious as they should be! There are plenty of small ones on the plants, so with luck I'll be freezing some of these as well as enjoying them over the next few weeks.

I've been watching the first tomato getting gradually redder and redder, and the other day decided it was time to pick it.


First tomato

Frankly, this was disappointing, too. I know what fresh picked tomatoes should taste like, and this wasn't it. It was slightly better than supermarket varieties, but not much.

Oh, well. When the disappointing crops are much the same as I would have bought if I wasn't growing them, and the good ones are much tastier, that's still a pretty good result on average.

Monday, 15 August 2011

Potato yield

This is just a quick update on this morning's post about potatoes. I've now dried (more or less) and weighed all the spuds, so I can report the yields:

Foremost first earlies: 29 lb 7 oz (I found a few more this morning)
King Edwards maincrop : 51 lb 9 oz
Desiree maincrop : 41 lb 1 oz

Total : 122 lb 1 oz

If we eat potatoes twice a week and use one pound per meal (which I do), then a year's supply would be 104 lb, and we've comfortably exceeded this. If I get the storage right and the blight doesn't ruin the lot, then I've successfully grown an entire year's worth of spuds, which makes me very happy :-)


Sacks of spuds destined for the store room. Those that were dug too soon, or that I stuck the fork through (rather a lot of the Desiree) are in the kitchen, for using soon or turning into frozen chips.

Buried treasure

It's been rather longer than the recommended two weeks since I cut the tops off my blighted potatoes but my dad was staying, and then it was wet, and...

Well anyway, I finally got round to digging yesterday evening. It's backbreaking work and it left me with sore and blistered hands, but this moment is pure magic, every time:


That moment when the earth breaks, revealing beautiful potatoes

I couldn't manage the whole lot in one go, but I woke fairly early this morning so I decided to get up and dig up the rest before breakfast. So it was that by 8 am, my potato patch looked like this:


Potatoes drying in the morning sun

I was constantly amazed at how numerous, and how big, the spuds were. I'll weigh them when they're dry and I've brushed most of the dirt off, and let you know (and record for myself) the total yield.

I even managed to find the sacks I bought to store them in, but Pebble has claimed these.


Thank you for putting out these nice sacks for me to sleep on!

Tuesday, 26 July 2011

Last of the blackcurrants and first of the peas

I have been very remiss with my blogging. This post should have been written early in the month, but my sister was staying, so blogging seemed a bit unsociable at the time, and then I got distracted...

As the title indicates, I picked the last of the blackcurrants from our bushes. These are the ones that I left first time round because they weren't ripe enough yet. They were certainly ripe by the time I picked them and I got about a pound, which isn't a huge amount, but enough to be worth picking. I got about 250 ml cordial out of them, and one jar of jam. When I first boiled up the jam I thought I'd gone too far and made toffee, panicked and added some water to thin it down to make two jars of jam. I obviously added too much water, as it didn't set, so it all went back in the pan, boiled a bit longer and into one jar, which set beautifully. I don't know whether it's toffee or not.

I also picked a handful to throw into some cake mix:


Blackcurrant cupcakes - most delicious

As for the peas, well, the supports are showing the strain a bit. I give them a shove from time to time and they haven't broken yet...


Pea canes struggling under the weight

They are well laden with pea pods:


Lots of yummy peas - well, they will be soon anyway

I started picking them a couple of weeks ago. They were too small then, really, but I wanted to share them with my sister, and they were very tasty!


Pod of peas picked at just the right time

I've been harvesting them every few days since then, getting a few ounces at a time. I'd like to say I'm getting better at judging when the peas inside will be big enough to be worth harvesting, but it's still pretty hit and miss. The pods get big first then the peas inside swell up to fill the space. It's not easy to tell whether that has happened or not.

We went away last weekend, and on Friday I noticed peas ready to pick that would be old by the time we got back. These were picked, cooked and frozen. Stocking up for the winter has begun!