
At this point I hesitated because the survey was to check that the house was suitable, and I was worried there might be damp in the loft which would rule us out. There definitely had been damp, and there had been insulation stuffing up the ventilation gaps in the eaves, too. I'd removed the insulation some time ago but needed to check whether it had solved the problem but couldn't face going up there to check, and potentially find a problem I didn't know how to fix. Eventually I got round to it, found no damp, and sent an email suggesting a few dates for the survey, then... heard nothing.
After quite a lot more of hearing nothing, I was surprised when a bloke turned up saying he was here to do the loft survey. OK, wasn't expecting him, but never mind. He checked one of the three sections of loft (the house is in three parts; so is the loft), asked whether the other two were much the same, and confirmed that we would be eligible for free insulation, and that it would be installed in a few weeks (a letter arrived a couple of days later with an installation date).
Indeed it was. The same bloke and another one turned up with a van full of insulation and filled our loft with it. In the process they discovered a complete absence of joists in the middle section of the house. Interesting.
We'd removed the most awkward things that were stored in the loft (notably a mattress) but they were OK to work round the smaller things. Nonetheless, it was obvious that stuff in the loft created a problem when resting on all that fluffy insulation.
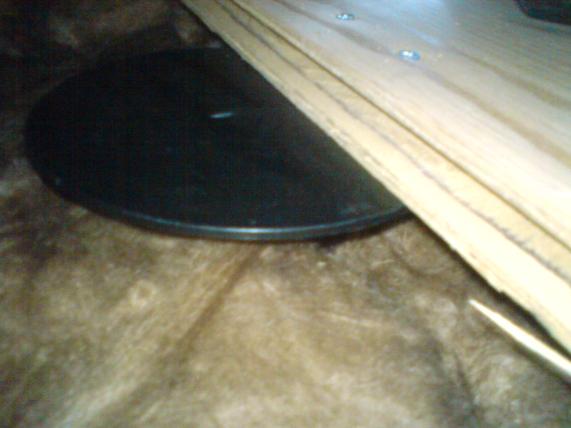
 Box of Stuff squashing the loft insulation
I asked what we should do about this - it's obviously not an uncommon problem, so there must surely be a common solution. Apparently what we should have done was to build up the joists so that the insulation could go between them and boards sit on top. No clever solutions available at this stage. Hmm.
A google search quickly revealed this information to be complete rubbish. I had thought about what I'd ideally need to solve this problem: Short posts to go through the insulation with brackets on the bottom to fit over the joists. Then I could screw the boards down to the top of the posts like a many-legged table. It seems that I wasn't the only one to hit on this design: Loft storage stilts are exactly what I had in mind, but with an additional disc on top to make the screwing down part easier. According to the website, they're only available at B&Q, which is OK as we now have a B&Q in Aberystwyth. I checked this company's website, but no mention of the stilts. I sent an email to the manufacturers expressing hope that they were still in business, dismay at their product's absence from B&Q's website, and some pessimism about my chances of getting any sense out of B&Q's staff.
My pessimism proved ill-founded (well, it may have been well founded, but it was unfulfilled) when we went into B&Q the next day for mortar, and while we were there I asked about the stilts. These couldn't actually be found in the shop, but were on the computer, albeit with unclear information about how many there were, and where. The staff couldn't have been more friendly and helpful, faced with these limitations. The next day (and the first working day after I wrote to them), I got a reply from the manufacturers telling me that they were having trouble keeping up with demand, but all branches should have fresh stock in a week's time. I waited a week, went back to B&Q, and sure enough, there was a big bin of loft storage stilts just in front of the loft insulation, priced at £1.78 each or 12 for £15. I'd calculated that I'd need 25 for four boards (and I'm glad I had, because their guide to how many you'd need didn't make much sense), so that cost £31.78, which wasn't too bad, especially as I'd only seen the
eachprice on the computer the previous week.

One shiny new loft storage stilt
Right then, boarding the loft. Obviously I wasn't approaching the job quite the right way. Even with the fancy stilts, I still should have starting before the insulation was laid across the joists. Oh well. The stilts have tabs on the bottom brackets so you can screw them to the joists, but I didn't think it would matter much if I skipped that step. They'd be stable enough once they had a board screwed to the top.
I was using leftover boards from the underfloor heating, which being flooring boards were far more substantial than I needed for loft boarding, but those were what I had. They're 8' x 2', and needed stilts down each edge, spaced at one per joist. All I had to do was find the joists and poke the stilts down through the insulation and over the joist, which turned out to be surprisingly easy. Most of the places I needed stilts happened to be in the gaps between two pieces of insulation, and where it wasn't, it wasn't too difficult to tear a hole to stick the stilt through. I started next to the loft hatch with the first row, then measured 2' along the joists for the second row before fixing the first board in place.
It turned out that the hardest part of this job was getting the boards up into the loft. Eight foot is pretty long, bearing in mind the typical headroom in a loft. To make it more difficult, the hatch was only about 2' square, so the board had to go through diagonally. Somehow, with a lot of manoeuvring and swinging the ladder out of the way, we managed to get the boards up.
Having got a board into the loft, then next bit wasn't too difficult. One or two of the stilts fell over (not being screwed down) as I moved the board into position, but it was easy enough to pick them up again. At this stage I appreciated the big plastic discs on the tops, as they compensated for less-than-precise positioning and made it almost impossible to miss them with the screws. These really came into their own when I was screwing the second board onto each stilt as I couldn't see the stilts at this stage, so having a big target was very helpful. At least, I assume I didn't miss any; I have no way of knowing.
Loft board screwed to top of stilt
Once the first board was in place the job got easier as I could then kneel on that board to work on the next one. There was a small setback as the space for the second board was partly occupied by the central supports for the roof, but cutting a corner out of the board solved that problem. I didn't manage to fully engage any of the tongue and groove connections between the boards, but I decided that didn't matter much in a loft. Otherwise, the job went pretty smoothly and I now have an eight foot square boarded area in my loft.
The next issue raised by the new insulation was the loft hatch itself. As there's a proper fitted ladder in this section of loft, it was always a bit of a fiddle moving the hatch cover in and out of place past the ladder. With extra insulation around the edges it was almost impossible. There also wasn't space to put any insulation on the hatch cover itself, which obviously isn't ideal.
We'd had a hatch that hinged down in our last house, and I thought I might be able to convert this one to the same design. I knew I had some door hinges somewhere, and even managed to find them, after a bit of tidying up. Again, far more substantial than the job required, but they were what I had. I also found a rather cute little brass latch that I'd probably inherited from Grandma.
With quite a bit of trial and error, I managed to make the hinges fit, sort of. They need to move a little on their fixings as the hatch opens and closes, but that's OK. If I'd measured and calculated I'd probably have concluded that the job couldn't be done, or at least not the way I was trying to do it. Now I have a hinged loft hatch with a cushion of insulation (leftover from downstairs)...

Loft hatch hanging from new hinges
... and a nice little brass latch.

Latch, needed as much to pull the cover down as to hold it up.
Having suitably upgraded my loft, all that remained was to move stuff onto the boarding. That was easy for things already in that section of loft, but a bit more effort for things stored in the loft at the other end of the house. This section doesn't have a fitted loft ladder so we have to use a separate ladder, propped against the edge of the opening. If you push the ladder right into the loft, the hatch cover catches on it when you close it and you can't get the ladder out, so I always rest it right on the edge. It has rubber feet on both ends, so it's secure enough.
As I went up and down the ladder with various boxes and bits, I cursed the flex in the ladder that added to the strain on my already aching legs. I had quite a lot of trips to do to fetch everything down and I'd nearly finished when, stepping out of the loft onto the ladder, suddenly the ladder wasn't supporting me any more. With a small shriek, I fell through the hatch after the ladder, landing in a painful heap on top of it.
As I lay there, my first thought, after
Ouchand catching the cast iron fire surround* that was threatening to fall on top of me... OK, my third thought was that there was no-one around to come and rescue me as Ian was out. Then I wondered what I was expecting him to actually do. Then I realised that nothing was broken and I was quite capable of moving, and the ladder really wasn't the most comfortable place to lie. I eased myself off the ladder and a few feet away until I could lie flat on the floor with my knees up and recover.
Although I felt very battered, in truth I wasn't much injured. I have bruises on each arm thanks to a reflex of throwing them out as I fell - painful in a narrow hallway, but probably slowed my fall. My neck and shoulder muscles are aching and stiff from preventing my head smacking into the ground, and I have the most spectacular black-and-blue bruise across my arse from where it met a rung of the ladder. In turn, the ladder is somewhat bent. This wouldn't have happened if it had landed flat on the floor, but in the hall is the cupboard where the hot water tank lives, which we haven't yet put doors back on, and the vacuum cleaner also lives there. Without doors, the hose of the vacuum cleaner spills out into the hall, underneath a falling ladder, preventing it from landing flat on the floor. Like the crumple zone in a car, that bending of the ladder absorbed quite a lot of energy, which probably saved me from more serious injury, so you could say that Henry saved me!
The moral of the story is, don't check your ladder just once at the start of a job, keep checking it as you go, in case it moves.
---
* We brought this from our last house and haven't quite decided what to do with it yet, so it stands in the hall, propped against the wall (except when it's falling over) making a useful small shelf with its mantlepiece.
Blimey. Sounds like you had a bit of a lucky escape there. Hope you are recovering, from the shock as well as the injury - your description of the fall has made me go slightly wobbly.
ReplyDeleteAnd as always I am in awe of your supreme DIY skills and getting-on-with-it-ness. I wish you could pass some of it on to me. Can't seem to get on with anything at the moment...
Have a good (and not too sore) Christmas...