It may seem like an ambitious place to start, but I needed a dress to wear to my cousin's wedding. I had a dress I'd worn to another wedding earlier in the summer, but that was a) an evening dress, so not really appropriate for a daytime wedding, and b) in need of many safety pins to hold it up. So, with just under a month to go before the happy occasion, I decided to make myself a new dress.
Taking inspiration from a dress worn by a friend recently (that I've just spent, oh, far too long trying to find a photo of) I had an idea of the design I wanted. This consisted of a simple top - basically triangles over the bust, though I'd want a bit of shaping - set into a high waistband, with a skirt made of curved strips of different fabrics. Sorry I couldn't find a photo to make this clearer!
The first step was to find some suitable fabrics. As I no longer work in an office, I have no need of office-wear, so headed to my wardrobe and identified several shirts in co-ordinating colours that could plausibly be turned into a dress.

I no longer need these - they shall be sacrificed!
I decided to start at the top. I'm not sure why, but it seemed as good a place as any. When I say
top
, I mean bust, not straps. I chose the plain purple shirt for this bit, and the obvious place to look for fabric was the equivalent part of the shirt. Unfortunately this didn't suit, as a shirt is not entirely symmetrical, having buttons on one side and buttonholes on the other. Nevertheless, I started unpicking, and as I got to the top of the sleeves thought,
That's quite a nice curved shape there.
Use what you've got - that curve became the top line of my dress.
Having identified my pieces of fabric, I cut them approximately to size and set to work rearranging the flat pieces to fit my not-flat chest. There was much holding of fabric against myself, pinning and adjusting. No, you don't get photos of this bit! Once I'd decided where to make darts, extensive tailors' tacks were applied to mark the positions, so I could transfer them accurately onto the other piece before stitching.

Extensive application of tailors' tacks.
Now I was ready to start sewing. Well, not quite ready. I'd found a small space in the spare room for the sewing machine...

A space for sewing
... but hadn't actually tried using it yet. Soon fixed. I picked on the cuffs as unlikely to be of any use, and tried a few lines of stitching.

Test stitching looking OK, actually
After a few goes, I was happy with it and stitched in the bust darts and moved onto the next bit. I picked the collar and cuffs of the striped purple shirt as a suitable waistband. Together, they were easily big enough and had the added advantage of a button and buttonhole to close the back (use what you've got), though I'd need another to go with that.

Opening the collar/waistband to fit the top into
By the time I'd stitched those together, I essentially had a large bra. I did try it on, but no, you're still not getting pictures! Next step was the skirt. I measured my waist, the length of the drop to somewhere below my knees, and the length needed at the hem (I looped the tape measure round my legs and adjusted until it was about loose enough). I divided two of these by six and transferred these measurements onto a piece of paper, then drew freehand curves connecting them all up.

Pattern for one of six skirt sections
As I drew, I realised that one curve was longer than the other, so I measured along that curved edge, and drew another line for the bottom edge, to make sure they'd fit together.

Adjustment to pattern so the pieces would fit together.
Quite advanced, I thought.
I'd thought that I'd need to make these pieces up in patchwork, but when I looked at the shirts I realised that if I went
across the shirt, I'd be able to get the length and, get two pieces out of each shirt...

First skirt piece
... just.

Second skirt piece. Of course that fits! Who needs hems?
Right, we're really going some now! Cutting and pinning, cutting and pinning...

Skirt pieces pinned together
Pebble helped.
Once I'd got the whole thing pinned together, it was time for another fitting.
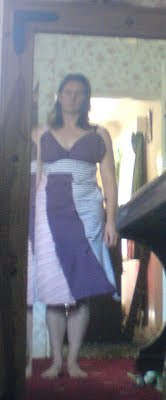
First fitting of pinned-together dress
For once, I'm glad this photo's terrible because it was at this point that I realised I'd forgotten one crucial measurement: My hips. Oops. Oh well, all was not lost. I'd been fairly generous with the hem allowances... maybe if I just moved all the pins closer to the edges it would be OK. I tried it on again, and it was definitely better. A little tight, but probably OK. I sewed it up.
I should probably say something about the experience of using the treadle at this point (given that I didn't say it earlier). Obviously it was more difficult than an electric pedal. My big problem was keeping the wheel going in the right direction. Because I was going slowly, it kept stopping and reversing, which tangled the thread round the bobbin and broke it. I found that if I put one foot right across the treadle and one with just the toes resting on the edge, I could get better control, but I still liked to keep my hand on the top wheel to stop it going backwards.
I got better at it with a little practice, and I certainly had plenty of practice with this project. The only really difficult bit now is going backwards - I need one hand on the wheel to make sure it's going forwards and one hand on the reverse button, which leaves no hand for guiding the fabric. Still, once I got into the swing of it, I was quite happy with the results.

Stitching. Not perfect, but quite tidy.
Anyway, back to the fitting. Um, no, it wasn't OK. Right then, unpick and add another bit in. Then do it again. Then tweak that seam again. Then squeeze another bit of purple in there...
There was quite a lot of unpicking involved in this project.
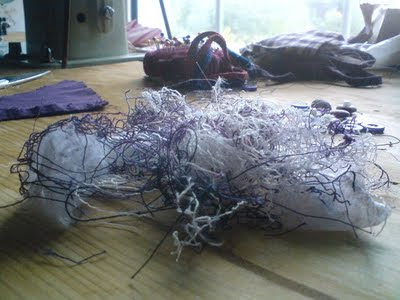
Unpicked thread
When I was finally happy that I had enough fabric in the skirt, it was time to hem the bottom edge. All that fiddling around made a mockery of my carefully aligned pieces, so I needed to start again with finding the length. Luckily I have a nifty little hem marker gadget. I thought I had a photo of this, but can't find it. I have a cat draped across my arm now, so I'm not getting up to take another pic. Here's an identical one that was for sale on etsy:
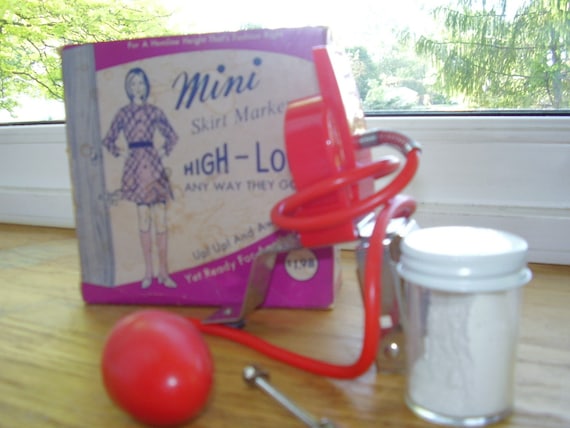
Don't you just love the box?
This gave me a series of white chalk dashes around the hemline...

Marking the hem
... which enabled me to sew a more-or-less straight hem.
Getting there now. At some point in the many tryings-on I noticed that the top wouldn't cover my bra at the back, so I needed more fabric there. Remember me thinking the purple cuffs were unlikely to be of any use? Wrong! They were exactly what I needed. So, more unpicking before adding another row of cuffs to the back. Straps were added, made from the lower sections of the pink collar (use what you've got), then I had to face up to the extra buttonhole.

Buttonhole fail
Hmm, that didn't go very well, did it? I gave up on that and did it by hand instead.
All I had left to do after that was to iron the dress into submission, and I think that brings me to the end of the project. No... not quite. I tried on the dress and asked Ian's opinion.
Um, it does look a bit Madonna.
I'd set the bust darts too close together and given myself a torpedo bra - really not suitable for a wedding! Minor last minute adjustments later, and..
...Here I am wearing the dress at the wedding, posing next to the cake that I had piled fruit on earlier that morning.

I was quite proud of that cake, if I do say so myself.
The dress was OK, too ;-)