About this blog

My photo
Wales, United Kingdom
Documenting one couple's attempts to live a more self-sufficient life.

Sunday 27 February 2011

We went for a walk...

... and saw the first daffodil of spring!


We also saw some burnt gorse bushes, which looked rather dramatic. Here are a few piccies:


Easier knooking

I never set out to write a crafting blog, with tutorials and patterns, WIPs and finished products, but I've learnt so much from other people's blogs that when I have something that might be useful to fellow knookers and would-be knoookers, I feel almost duty bound to share it. So here's a little tutorial on a new and improved method for knooking.

I mentioned recently that I'd come across an easier way of doing the purl stitch, kindly provided by Ronda. After using this for a while I noticed that I was getting twisty stitches.

[Edit: Ronda's method does not produce twisty stitches. She's now posted a video, from which I can see that I'd misunderstood her instructions for the purl stitch, so that's why I was getting twisty stitches. Anyway, my adapted version of misunderstood instructions ends up with a method that also works, so this is a third knooking method.]

Twisty stitches don't bother me greatly, but having noticed them I started thinking about why they were happening, and thinking, and thinking...

It gets a bit technical here, but only a bit. Each stitch leaves a loop on the needle/cord that either has the leading edge at the front and the trailing edge at the back, or vice versa. Also, each stitch needs the one on the previous row to be a particular way round, either leading edge or trailing edge at the front. If you do a stitch that needs the leading edge at the front, but the previous row left trailing edges at the front, then you end up with twisty stitches.

[My misunderstanding of] Ronda's new purl stitch needs a leading edge at the front and also leaves a leading edge at the front. She changed the knit stitch as well, to leave a leading edge at the front so that it would be well set up for the new-style purl stitches. This only solved half of the problem, though, because [my... etc.] her new knit stitch needs a trailing edge at the front, so it still twists stitches when following the new purl.

I've developed the new knit stitch so that it now both needs and leaves a leading edge at the front, the same as the purl stitch. This means they work together with no twisting. So here are some brief instructions, with photos, of the two stitches:

Knit stitch

With the working yarn at the back of the work, push the hook from the left of the stitch, straight through the stitch from front to back.


Hook going through the stitch to start a knit stitch

Take the yarn under the hook and up across the front of it, then pull the hook back through to the front of the work.


Yarn across the hook for the knit stitch

Purl

Bring the working yarn to the front of the work and take the hook behind it, through the front edge of the stitch, from right to left (or the other way if you're left handed).


Hook through the front of the stitch, ready to purl

Take the working yarn up across the front of the hook before taking it over behind and right round the hook. As you pull the hook back through the loop, move it slightly to the back, so that the old stitch falls off the front. It is possible to drop the stitch off the back, but that way lies much twistiness and confusion.


Winding the yarn round for the purl stitch

I hope the words and pictures here are clear enough to explain this. Let me know if not and I'll have another go.

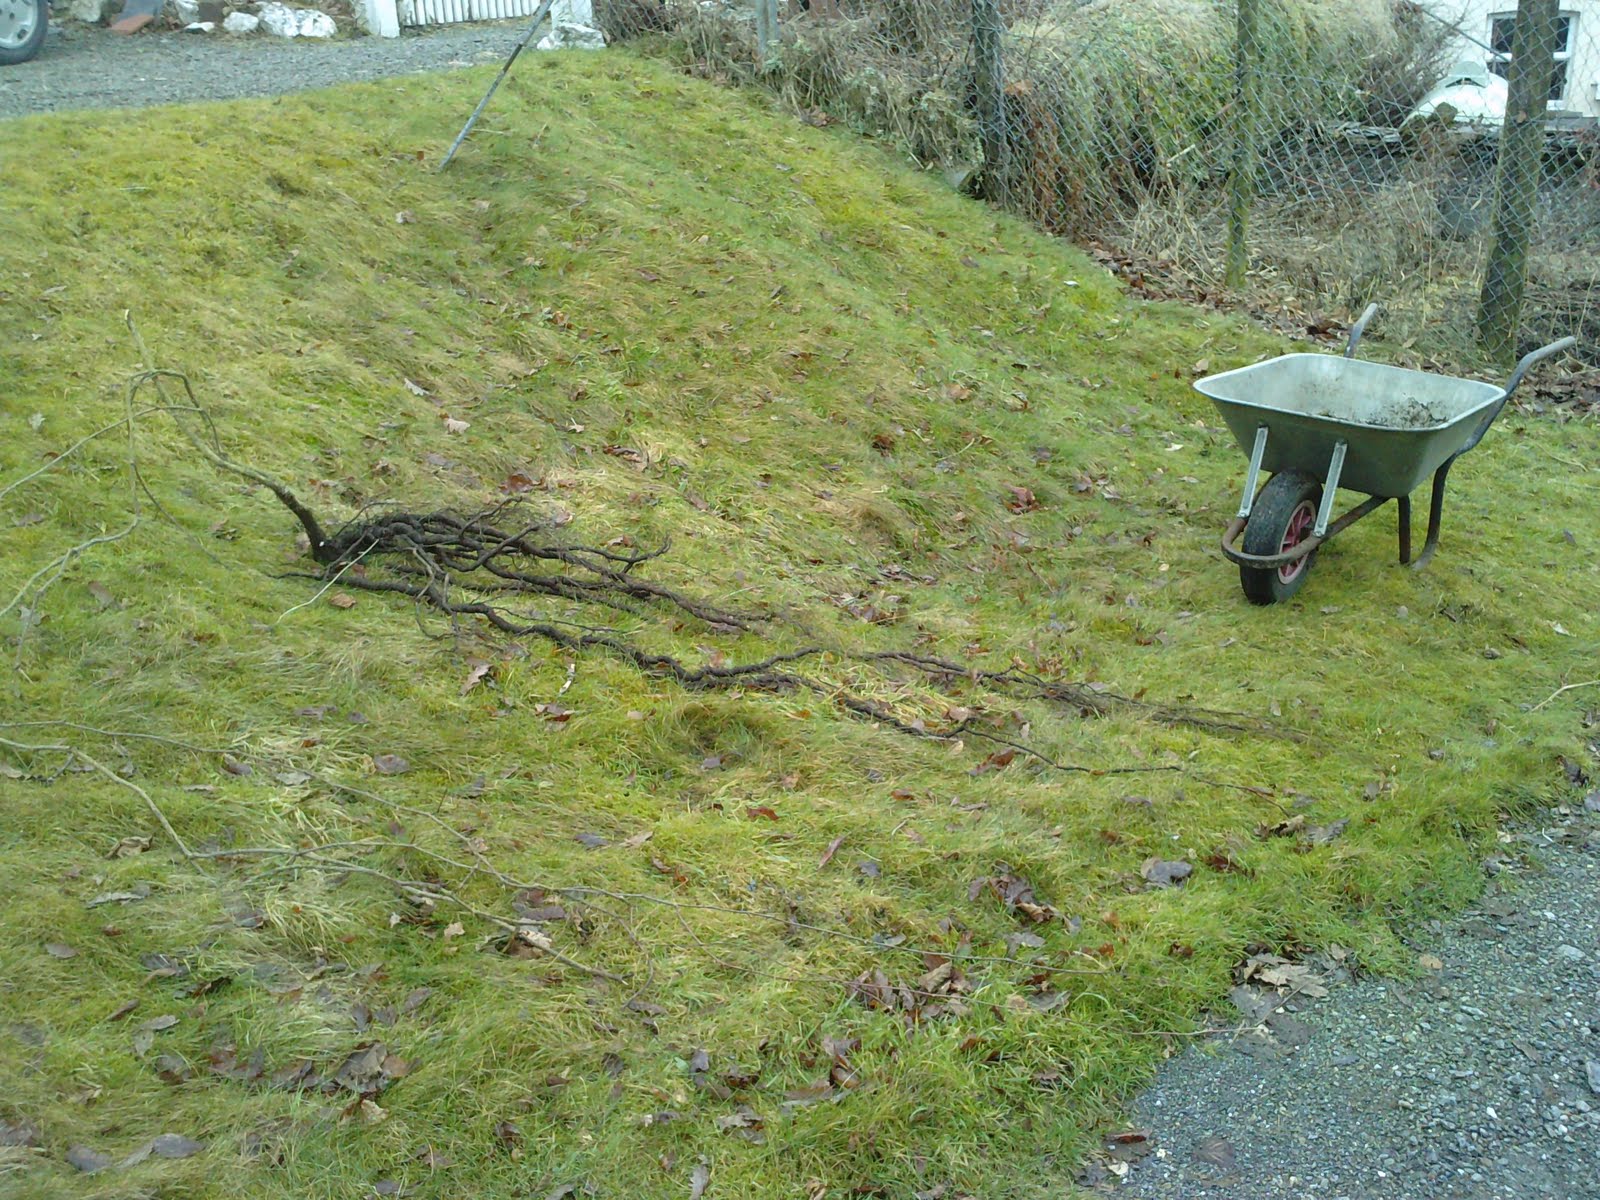
Looking at these photos, my hands look pretty horrible. This is because I've been doing a lot of gardening recently and they are horrible!

Friday 25 February 2011

Gardening on the edge

Recently I've been working on the strip of garden at the edge of the top bit. The risk of falling off, or of destroying the retaining wall and causing a landslide, added a certain air of danger to the whole experience.

It was sunny when I started...


Halfway through 'The Edge' while the sun was still shining and I was still full of enthusiasm

I felt enthusiastic enough to tackle the big laburnam on the arch (second of three, for those who are counting):


Here, the beast is slightly disturbed. It took three of us to finally shift it, taking several of its roots with it. It is now settling in to next door's garden.

Flushed with the success of uprooting the laburnam, I proceeded to tackle the colony of crocosmia that were smothering a small rose bush. You can just about see them in the above photo - you see that patch of light brown, close to the house? That's crocosmia. Having removed a big heap of the stuff, I started replanting some of it on a bit of hillside the other side of the house, but it was getting dark and I was getting tired, so I didn't get very much done.

Liberated rose bush on the left, first patch of relocated crocosmia on the right... no, not the darker brown patch, that's bracken, the lighter brown in the foreground... yes, that's it... that's the crocosmia.

That was last Friday (a week ago). On Saturday I got up in the morning, looked at my gardening clothes, and just couldn't face putting them on. I wore smart clothes that day (for 'smart' read 'relatively mud-free jeans') and did indoor things.

When I dragged myself back to the task of replanting the crocosmia, on Sunday, I realised it wasn't the dirty clothes that I'd had enough of - my muscles were seriously complaining at the challenge of keeping me stuck to the hillside at the same time as digging holes and stuffing heavy bits of crocosmia into them. I should point out that this particular bit of hillside includes a retaining wall part way up. You can tell when you're digging in the wall because it has mortar between the stones. Otherwise, it's not much different from the rest of the hill. Never mind a nice terraced bit of flower bed - planting things on that hillside is extreme gardening, and it hurts.

Here's the crocosmia, replanted all over the hillside:


Look carefully, there are scrubby brown patches all over that bit of hill.

In case you're wondering why I bothered, this is what crocosmia looks like when it's in flower:


Picture of crocosmia courtesy of West Highland Flora

When I recovered from the crocosmia replanting challenge (and digging up a massive laburnam probably didn't help, either), I moved a small hazel tree to a different bit of hillside...


The replanting of the hazel tree. I had to show you the picture on the left so you could see the bucket of stones that came out of that small hole.

... I finished digging over the bed on the edge and moved some bluebells into it...


Finished this bit! Most of this needed digging twice to get all the weeds out, which was very demoralising. The green patch in the middle is the bluebells.

... to make way for new fruit trees...


Planting a cherry tree. Or possibly a plum tree. I've already forgotten which way round I planted them. I leave the labels on for a reason.

... and I received a surprise gift from my parents-in-law of a selection of fruit bushes (Thank you very much!) so I made a bed for them in a bit of hillside near the hazel:


This one's probably blackberry. I'm not entirely sure what I've got here because the labels were all in latin and I had to look them up. It turns out that rubus is not very specific.

Oh, and I've done some more digging in the bit behind the herb garden, too. Do you notice how many of the pictures on this page are either dark or flashlit? That's because I tend to keep gardening until it's too dark to continue. It's no wonder I'm feeling tired!

Thursday 24 February 2011

Ketchup

Ian had a hankering for bacon sarnies for lunch today, and I can't argue with a bacon sarnie, but I fancied ketchup with mine and we didn't have any. Maybe I could make some, I thought - it's basically tomato sauce preserved with vinegar and sugar, isn't it? I emptied a tin of tomatoes into a pan and started it cooking while I consulted the recipe books.

Delia had a recipe for Victorian plum or damson ketchup, which confirmed my hunch about the basic idea... and salt - don't forget the salt. I had to double check the quantities though, luckily I noticed she was using eight pounds of fruit, or I'd have ended up with far too much vinegar etc. Mrs Beeton had nothing that looked like ketchup (I thought it was a Victorian recipe!) and neither did Jane Grigson, so I gave up and used Delia's version as a general guide.

I didn't have any spirit vinegar as recommended, so I added a capful each of balsamic and wine vinegar, and possibly cider vinegar too, I can't actually remember now. Delia used brown sugar, but I didn't want too strong a caramel flavour, so I just put a bit of brown sugar in - probably a couple of teaspoons - then added white granulated - probably a couple of tablespoons. As you can see, I'm not very precise about quantities - just chuck stuff in and see what it tastes like. Oh yes, and salt. About a teaspoonful. Don't forget the salt.

Once that lot had cooked down a bit (tomatoes = mushy, quantity = less than it was to start with), I pushed it through a seive to get a smooth consistency, then decided it was too thin, so put it back in the pan with a fair bit of cornflour in a little water and heated again. At this point I got the urge to add celery salt. I tried to resist this urge as I didn't want to ruin a perfectly good sauce with random spices, but it wouldn't go away, so I gave in. It turned out that my subconscious was right: The celery salt took the edge off the sweet and sour taste of the vinegar and sugar.

The end result looked a lot like ketchup, and it tasted pretty good, too. Not like Heinz, but Ian actually prefers my version. I'm rather proud of this - can you tell? He says it's not so strong, which I think means it has less vinegar, and probably less salt.

It's ketchup! Yes, I know it's in an olive jar, but I don't think I'm in any danger of picking up that jar and expecting to find olives in it.

And here it is in its proper place, on a bacon sarnie:


Mmmm, bacon sarnie!

I should point out that most lunchtimes, that bread would have had nothing but a bit of butter on it, or maybe some jam, but today we dined like kings*!

*Kings who are eating bacon sandwiches, that is.

Tuesday 22 February 2011

Hair experiment: The Conclusion

... is inconclusive. It's six weeks today since I last washed my hair and I can't say for sure whether the experiment has worked or not. Here are some pictures - see what you think:


Picture on the left is of combed hair, on the right was before combing.

And now for my close-up...


A lovely view of my my ear and a closer view than you really want of my hair.

After two weeks it was really horrible, then it improved a bit. From the third to the fourth week I was convinced it had settled down to a natural state that was more sheep's wool than cat's fur. Then... it started to improve again, ever so slightly. It's been gradually improving ever since.

At the moment I'd say it's acceptable, but not nice. I can walk down the street with it loose and not attract attention, but it doesn't have the light, silky, shininess that it used to have straight after washing. It still feels a little oily, but nowhere near as bad as it did at its worst. Oily makes it sound worse than it is, but I can't think of the right word.

I did say that after six weeks, if I wasn't happy with my hair, I'd go back to washing it. Well, I'm not entirely happy with it, but I'm not ready to give up on the experiment just yet. I think it's probably still improving, so I'm going to give it another two weeks and reassess it then.

Monday 21 February 2011

Old fashioned cooking

When I hadn't known her very long, I was chatting with Ian's aunt about cooking and roast dinners in particular. She said, In the old days, you know, people used to boil down the bones afterwards to make stock. Well, I've been doing that for years. So here I am, cooking in the old days.

I quite like the fact that I cook the way they did it in the old days. My mother was a good cook, and her mother was a good cook, and so was her mother, so I'm told. Quite a lot of my kitchen equipment is inherited from them and I have their cookery books. I love that connection with the past. It gives me a sense of rootedness; of continuity through the generations.

In addition to making stock from old bones, I've been trying to extend my repertoire of old fashioned cooking skills. I'm focusing mainly on meat at the moment. This is mostly because it's expensive but, with Ian to feed, unavoidable. Stock is not the only product of boiling down roast dinner leftovers; there's also fat. In the past I've always thrown this away, current received wisdom being fat = bad. At the same time, my culinary education was good enough that I recognise fat as an important ingredient in most cooking, and that most cooking fats are to some degree interchangeable.

I now not only keep the fat that comes from making stock, I also keep and render down other waste fat, such as bacon rinds. Sometimes I find I have stock as a byproduct! I use this in place of cooking oil for frying onions (the starting point for many dishes) and in place of butter in making pastry. I may yet try to use it in soap-making. I've noticed I'm using far less oil than I used to, though I can't say the same for butter as I've also taken up baking, and some cake recipes use an awful lot of butter (mmm, chocolate brownies...)


I don't have any good pictures of brownies, but Sarah over at Cake in the Country does. Her brownies probably taste better than mine, too :-)

Dragging ourselves away from chocolate brownies briefly, my other attempt at old fashioned meat cooking is to use cheaper cuts of meat. Learning how to make these edible chiefly involves stewing. This is a very slow process, especially if I'm trying to separate out the fat (less in the stew, more to use later - it's win-win!) I first stew the meat in water (gas mark 'S' for slow) for several hours. Then I take out the meat and leave it and the liquid to cool separately. The fat floats to the top of the liquid and sets, so it can be removed quite easily, though getting excess fat out of the meat is more fiddly. After this, meat and cooking liquid can be recombined and veg added and the whole lot heated up to cook the veg. Finally, I usually add some flour to thicken the gravy.

The whole process takes the best part of a day, though obviously I don't have to stand over it all the time. Not only are the tough cuts of meat cheaper to start with, but I've been surprised at quite how much veg I can add and still end up with something that's essentially a meat stew, and I get the cooking fat, so it's very economical all round. When it works, it's very tasty and there are usually leftovers (stew again; pie filling; dilute to make soup) but I'm still learning. I now know that no matter how long you cook shin of beef, it will still be full of gristle and it takes a hell of a lot of work to pick it all out. It's unfortunate that the in-laws were visiting when I learnt this lesson.

I mentioned that I've taken up baking since moving - I didn't really do any before. Having learnt how to make bread, we hardly ever buy it. I generally make a loaf every three days plus pizza bases (Friday night is pizza night - make two at a time and stick one in the freezer). This has now become normal, which is what needs to happen at this stage - when I'm learning how to process and store the harvest (hopefully!) I don't need to be thinking about how to make basic things like bread.

My other baking activities include little pies, which I love but Ian doesn't. I'm sorry about that, but he has to put up with it because I do the cooking. Then of course there are cakes :-) I'm a dab hand at running up a batch of cupcakes by now. Which is nice.


Homemade scones with homemade lavender jam syrup.

Saturday 19 February 2011

Learning to crochet

I said that I'd be sticking to basic stiches until I finished knooking the baby blanket. I also said that I wouldn't talk about knooking again until then. I lied. Twice. Notice how the title of this post is about crochet, not knooking? It's still really the same subject. I cheated as well as lied. I am a very bad person. I'm sorry.

First, I found another blog devoted to knooking. As luck would have it Ronda, the author of this one, has just worked out an easier way of doing the purl stitches, for which I am very grateful. She has also been working on projects that mix knooking with crochet, something I'd been pondering as a possibility.

Seeing Ronda's designs made me want to have a go at incorporating some crochet, but also made me realise that I don't know the first thing about this craft. Time to learn how to crochet.

Rather than searching this internet I decided to consult a book, for a change. I have a rather lovely old book called, "Encyclopedia of Needlework" by Thérèse de Dillmont*, which I inherited from my grandmother. There's no sympathy for the struggling reader here: At first sight some of the designs may appear rather difficult to execute, but when the directions are accurately followed all difficulty will disappear. If you're having trouble it's because you're not following the instructions properly!


Encyclopedia of Needlework

I haven't tried using this book before, but I gave it a go and sure enough, if I followed the instructions very carefully, my work looked pretty much like the illustrations. A little more consistency would have been nice. As far as I can tell, the following two descriptions refer to the same stitchwork:
Throw the thread round the hook, pass the hook under the two halves of a stich and catch hold of the thread, draw the thread through the stitch...
Bring the thread from behind round the front of the hook, put the hook in between the stitches of the row before, make an over, bring the hook forward again with the thread...

Here's my first attempt:


First attempt at crochet.
I used an offcut of yarn that Pebble the cat had helpfully detached from the rest of the ball. This is why the piece finishes halfway through a row.

Having managed several of the stitches described in the book, I decided that the next square in the baby blanket would have to be crochet. Here it is:


Crocheted 'square' for baby blanket

It's not very clear in the picture, but there's a pattern in bobbles (pine-apple stitches) in there somewhere. There are also two types of background stitch; close to the bobbles are half trebles and around the outside is counterpane stitch. How could I resist counterpane stitch?!

As you can see, I'm not terribly good at counting the lengths of rows, mainly because I don't bother. I get to the end and think, This is about it. It turns out that this isn't a very good way of ending up with a tidy square. Never mind. I'm really quite pleased with this, overall.

Next step: Can I combine knooking with crochet without getting long threads trailing across the blanket?

---
*If you thought commercialism was a new phenomenon, think again. This book is full of recommendations for D.M.C yarns, having been published in 1884! I had to google that because there's no date printed in it, and found that the entire text is available online, complete with engravings.

Feed the birds

Having bought Stupidly large quantities of sunflower seeds, I thought I might at least use some of them for their intended purpose, namely feeding the birds. One small hitch in this plan was that I don't have a bird feeder, but that's OK, surely I can make one!

There was a roll of mesh that had been attached to the greenhouse, presumably to shade tender young plants from the scorching Welsh sunlight... erm... I'm not sure what it was there for, so I took it down. That seemed like a good starting point for a bird feeder.


Garden mesh swiped from greenhouse

There were also some little bits of wire that had been used to hold the mesh up, which would surely be just as good at holding it into a birdfeeder shape. Much fiddling later...


It's looking a bit like a bird feeder by now

Finally I persuaded the mesh into a suitable shape, filled it with seeds, and closed the top with a hook-type piece of wire. The washing whirlygig seemed like a good location for it, being in view of the window, unused due to excessive height and lack of sunshine after 9:30 am, and close to where the bluetits hang out, so that's where I put it.


Bird feeder in situ, but not quite finished yet...

After a couple of days with a distinct lack of birdy interest, I modified the feeder with the addition of a twig for sitting on and larger holes in the mesh just above the twig... and they came! Well, a few tits had a go at feeding there a couple of weeks later. Once.


Great tit tackling the feeder

We haven't seen them again. I have modified it further with a second perch and better-placed feeding holes, but I don't think they've noticed. No further interest anyway. Maybe it's not that easy to make a bird feeder, or maybe there's just too much choice around here - I suspect there are superior feeding opportunities next door.

Thursday 17 February 2011

Wild food in the garden

Spring is in the air and new leaves are bursting forth all over the place. Mostly these are weeds, but some of them are also edible. Desiring something different to go on my pizza this evening, I headed into the garden and gathered ground elder and nettles, the former thanks to a tip from Green Aura on the Selfsufficientish forum.


Ground elder and nettles. Don't they look vibrant?

Here they are on the pizza:


Pizza with delicious greens on MY half

Notice how the greens are only on one half of the pizza. Ian isn't keen on eating green things at all - peas are his limit - and he certainly wouldn't contemplate weeds on his half of the pizza.

Nettles obviously require some care in the preparation, though they're quite safe once they're cooked. I wore rubber gloves to pick them, then put them onto the pizza with tongs, then having got some tomato sauce on my finger, licked it off... complete with small nettle leaf. OOPS! It wasn't actually as painful as you'd expect, but I can still feel a slight tingling on my gum three hours later.

The pizza was delicious and I'm very pleased to have learnt about a new tasty weed. I love being able to eat wild things from the garden. Let's face it, I'm not going to get rid of them however hard I try, so I may as well enjoy eating them!

Tuesday 15 February 2011

Digging - first stage finished

I've finished digging over the bottom part of the garden - yippee!


There are two more beds behind that wall. They're dug, too.

Now I just have to do the top part...


Harder to get a photo of this area but it's big, trust me.

Just because it was difficult to get, I'm going to show you one more picture of the garden.


View of garden from the conservatory roof

Sorry if all this digging is getting boring, but that's what I'm doing at the moment.

Monday 14 February 2011

Relocated bulbs identified

They're snowdrops!


Unidentified bulbs revealing themselves to be snowdrops

I'm very excited about this, because I love snowdrops and I thought there weren't any in this garden. They're so late flowering this year (possibly not helped by being six inches too deep, then dug up, frozen, flooded and frozen again) that they're not alone in being the first sign of spring. We also have...


The fabulous purpleness of an emerging crocus

and...


The tiny nub of pinkness that will become rhubarb

I also have new shoots in the seed trays:


Which ones are the onions, do you suppose? I'm betting on the white wormy ones, but I'm not pulling the other up yet, just in case.

In other garden news, I'm pressing on with the digging. It feels like I'm making good progress, as I've nearly finished the lower part of the garden, i.e. the raised beds. The trouble is, when I look at my plan, I realise this is slightly less than half of the garden, and I'll have to do the whole lot before I've finished. Still, it's good healthy exercise in the fresh air!

Today I dug up a Virginia creeper whose roots occupied several of the raised beds, a laburnum that was blocking the path, and two everlasting sweet peas. The latter were by far the hardest work - they made yesterday's ground elder (which had colonised two beds) seem easy.


Virginia creeper. It did have a lot more vines, but they broke off when we tried to untangle them from the fence.

I gave the creeper and the laburnum to the neighbours, who were polite enough to accept them.

Sunday 13 February 2011

I have a plan!

After much humming and hahing I finally have a plan for what to plant where in the garden.


First draft of garden plan

I used Suttons online veg garden planner, which has a thirty day free trial. Although there's an option to print the plan, the file can't be downloaded from their server, so I had to cheat to bring you the above plan. I hope you enjoy it!

As you'll see, our garden is not a simple shape and measuring it was quite a fiddle. It's not quite right - the bit round the LPG tank (empty space, top left) is wrong - but I think it'll do.

To start with, I went through my list of seeds and tried to fit them all into the garden. This led to... How much space do cabbages need?!!

At this point I returned to my list and considered how much of each veg I might actually need, rather than trying to grow all the seeds I have. For some - well, for the potatoes - I've only bought as many as I need. For others... hmm, I have 1,750 thyme seeds, I want about ten plants. As for the sunflowers...

The sunflowers are represented by the grey and brown knobbly shapes to the top right of the plan. Being a vegetable garden planner, the software doesn't include sunflowers, so I had to use Jerusalem artichokes as the nearest substitute. Either way, they take up a hell of a lot of space. I will try to put more in other parts of the garden (the plan covers that part that's been cultivated before - I have odd bits of rocky hillside, too).

Working out how many of each plant I'd need wasn't always easy. For some plants, like carrots, one plant = one veg, so it wasn't too difficult. Potatoes I'd grown before enough times to have a rough idea of how much I'd get from each plant. Peas were the most difficult. I usually buy these frozen, so I don't have a very good idea of how many peas per pod, or how many pods per plant, or how many peas per serving, come to that. In the end, I took the advice that you can't have too many peas and planned for 665 plants, which is all the seeds I have. I may come to regret this.

I'm treating this plan as a very rough draft, but it's a useful starting point. It shows me that I can fit all the veg (though not all the sunflowers) I want into the garden, just about. I'm not sure I've left any space to walk between them, but I'll deal with that problem when I get to it.

Friday 11 February 2011

Seeds!

All my seeds have arrived now:


Lots of seeds, including a stupidly large quantity of sunflower seeds

This is very exciting, but I still don't know where I'm going to put them all. In my previous veg gardens, I didn't really worry about this. I just started with the first thing - the potatoes can go there - then the next thig - I'll put the beans next to them, there - and so on. Now, though, it all feels a lot more serious. I really want to do this right.

I've read about the importance of crop rotation and of companion planting, which seem to contradict each other. The other day when I was trying to find out how much space sunflowers need, I learnt that they poison the plants next to them. This is not good news as one of the few decisions I'd made was to have the a row of sunflowers next to a row of asparagus, and I really don't want my asparagus poisoned! I feel that the more I study this, the more difficult it gets.

Maybe I'll just go back to the 'stick it anywhere' approach, though I fear I may run out of space if I'm not careful...

In the meantime, I have potatoes chitting:


King Edwards on the left, Desiree on the right, and Foremost new potatoes in the middle at the front. Written down here so that when the labels underneath have mysteriously disappeared and I've forgotten which are which, I'll be able to check.

Wednesday 9 February 2011

Knooking hook developments

I had a go at making another hook out of the second piece of twig, but that turned out to have a soft centre, and when I cut the hook it just broke, so that wasn't terribly successful.


Unsuccessful hook-making with twig from unidentified shrub

Returning to the holly wood hook, I continued my search for the ideal cord to go with it. I has some heavy duty linen thread in the sewing drawer, and I took a length of this and twisted it into four-ply cord. I'd never tried this before, but seen my mum do it many years ago. It involves tying the thread to a door handle and standing the other side of the room holding the other end. It probably goes more smoothly if the cat doesn't notice what's going on. After a couple of attempts I got a cord I was quite pleased with and threaded it through the eye of the hook.

I knitted a square of ribbing with the latest incarnation of the knooking hook and cord. With the exception of a couple of minor catastrophes it went very well. I pulled the cord too far and dropped half a row of stitches at one point, then had to use a knitting needle to pick them all up again and actually knit the second half of that row. I also managed to break the eye, but this was my own stupid fault for stretching the fabric against the hook. Having retrieved the craft knife, I trimmed the broken end and cut a new eye, then continued with a slightly shorter hook. I'd better not do this too often or I'll have nothing left!


Knooked ribbing

I'm happy with this combination of hook and cord. Until I break the hook again, this is what I'll use. As for knooking vs. knitting, knooking is so much easier for ribbing. Moving the yarn from front to back of the work is just a matter of a slight movement of the left index finger, as there's no second needle to go round. I finished this piece much more quickly than the knit one.

I'll stop talking about knooking for a while now. I like it, I have a hook and cord I'm happy with, and I'll be sticking with basic stitches until I finish the baby blanket. Maybe I'll try something more interesting after that, or maybe not. It will probably depend on how busy I am in the garden/how much it's raining.

Tuesday 8 February 2011

Relocating unidentified bulbs

A week or so ago - well, it was a week ago last Friday, which I guess is more than 'a week or so' - I spent another day digging. In the morning I finished digging over the big veg plot that the potatoes are going in, then went round to the neighbours and asked if they'd like the mahonia I'd mentioned to them before Christmas.

Further digging after lunch, with assistance from neighbours, saw the removal of the mahonia that was in the way of the asparagus bed and, while the going was good, an unidentified bush that was next to it, and a box bush that was obstructing progress on the new herb garden.

All three went to the neighbour, who couldn't quite belive I wanted to give them away, especially the box bush, which was pretty big. "This could cost £100 in a garden centre, if it was neatly trimmed," she said. Well I hope it was worth £100 to her, because it certainly wasn't to me. In fact, it had negative value because it was in the way!

You may be wondering what all this has to do with bulbs. Well... while we were digging up the box bush, we found a huge number of bulbs that neither of us could identify. We carefully removed them and put them aside to be planted later while we tackled the monster box (there were some very large pieces of slate in the roots - it might as well have been planted in a wall).

By the time we'd finished digging, it was extremely cold and getting dark, so I just put the bulbs in the wheelbarrow and covered them with soil to offer some protection from the frost. The next day I tried to retrieve them, but my attempt at protection turned out to be pitiful - the whole lot was frozen solid. I managed to extract some of them and put them in pots, but luckily the in-laws arrived to rescue me from that task before I got frostbite.

It stayed frozen for several days... and then it rained a lot... and then last night it froze again. This morning found the poor, abused little bulbs encased in ice.


Both flooded and frozen, poor little things!

By lunchtime today the sun had melted the ice, so after lunch I resumed the task of rescuing them. Rather than just sticking them in pots, I wanted to put them in a trough (well actually, I want to plant them under the fruit trees, but I haven't even ordered the trees yet). The trouble was, the trough was still full of strawberries. My plan for the strawberries was to put some in the new strawberry planter I got for Christmas and the rest along the edge of the new herb garden. The only trouble there was that the herb garden was full of weeds...

OK, so rescuing the bulbs had to start with weeding the herb garden. That was quite a big job, but once I'd done it, moving the strawberries wasn't difficult - certainly a lot easier than when the ground was frozen! With the strawberry trough finally vacated, I was at last able to fish the bulbs out of the soggy mud in the wheelbarrow. It became quite dangerous, as my fingers got too numb to feel the sharp bits of slate that were also in there (I didn't put them there; all the soil here is full of bits of slate).


Strawberries in new planter and bulbs in trough. They may not look very impressive now, but just wait until spring!
... probably. I don't know if they've survived and I still don't know what they are.


New herb garden, complete with hole where the box bush was, strawberries along the edge, and pots of unidentified bulbs.