About this blog

My photo
Wales, United Kingdom
Documenting one couple's attempts to live a more self-sufficient life.

Tuesday, 8 February 2011

Relocating unidentified bulbs

A week or so ago - well, it was a week ago last Friday, which I guess is more than 'a week or so' - I spent another day digging. In the morning I finished digging over the big veg plot that the potatoes are going in, then went round to the neighbours and asked if they'd like the mahonia I'd mentioned to them before Christmas.

Further digging after lunch, with assistance from neighbours, saw the removal of the mahonia that was in the way of the asparagus bed and, while the going was good, an unidentified bush that was next to it, and a box bush that was obstructing progress on the new herb garden.

All three went to the neighbour, who couldn't quite belive I wanted to give them away, especially the box bush, which was pretty big. "This could cost £100 in a garden centre, if it was neatly trimmed," she said. Well I hope it was worth £100 to her, because it certainly wasn't to me. In fact, it had negative value because it was in the way!

You may be wondering what all this has to do with bulbs. Well... while we were digging up the box bush, we found a huge number of bulbs that neither of us could identify. We carefully removed them and put them aside to be planted later while we tackled the monster box (there were some very large pieces of slate in the roots - it might as well have been planted in a wall).

By the time we'd finished digging, it was extremely cold and getting dark, so I just put the bulbs in the wheelbarrow and covered them with soil to offer some protection from the frost. The next day I tried to retrieve them, but my attempt at protection turned out to be pitiful - the whole lot was frozen solid. I managed to extract some of them and put them in pots, but luckily the in-laws arrived to rescue me from that task before I got frostbite.

It stayed frozen for several days... and then it rained a lot... and then last night it froze again. This morning found the poor, abused little bulbs encased in ice.


Both flooded and frozen, poor little things!

By lunchtime today the sun had melted the ice, so after lunch I resumed the task of rescuing them. Rather than just sticking them in pots, I wanted to put them in a trough (well actually, I want to plant them under the fruit trees, but I haven't even ordered the trees yet). The trouble was, the trough was still full of strawberries. My plan for the strawberries was to put some in the new strawberry planter I got for Christmas and the rest along the edge of the new herb garden. The only trouble there was that the herb garden was full of weeds...

OK, so rescuing the bulbs had to start with weeding the herb garden. That was quite a big job, but once I'd done it, moving the strawberries wasn't difficult - certainly a lot easier than when the ground was frozen! With the strawberry trough finally vacated, I was at last able to fish the bulbs out of the soggy mud in the wheelbarrow. It became quite dangerous, as my fingers got too numb to feel the sharp bits of slate that were also in there (I didn't put them there; all the soil here is full of bits of slate).


Strawberries in new planter and bulbs in trough. They may not look very impressive now, but just wait until spring!
... probably. I don't know if they've survived and I still don't know what they are.


New herb garden, complete with hole where the box bush was, strawberries along the edge, and pots of unidentified bulbs.

Monday, 7 February 2011

A Knooking Hook

Having established that I like knooking with sticky tape and an old shoelace, I needed to get myself a proper knooking hook. I was impressed with Loonie's DIY efforts, drilling an eye into a wooden crochet hook, and thought I'd have a go at doing the same myself. I did need to buy a wooden crochet hook first, though.

Then I thought about it a bit more, and thought that if I could tackle the fiddly job of drilling an eye in something so small as a crochet hook, surely I could also manage the task of forming the hook at the other end. In that case, what I needed was not a new wooden crochet hook, but a nice straight bit of stick.

I remembered that the holly sprigs I cut for Christmas decorations had some long straight twigs, and I quite fancied the idea of a holly wood knooking hook. I went out and cut myself a likely looking holly twig, and also a straight piece of unidentified shrub that was growing near the door.


A couple of likely looking twigs

I tried the holly first, starting by removing the leaves and peeling the bark off, as we used to do when we were kids, to leave a nice, smooth, white twig. It was straight, a little thinner than I was aiming for, and slightly tapered. With a craft knife, I shaved off the small bumps left by the leaf stems and cut a hook into the thicker end. I then cut a longish eye in the narrow end. This left very little wood either side of it, and was rather flexible, so I wasn't very confident it would last, but still, it was enough to thread a cord through.

For my test with the sticky tape, I'd attached the shoelace end-to-end with the crochet hook, with the result that there was no 'lump' for the knitted loops to go over as they slid from hook to cord. With an eyed hook, the loops must go over the folded end of the cord plus the thickness of the hook, which would make a big lump to get over if I used shoelace again. Besides, I'm not sure I could even get the lace through the eye.

Thinner 'cords' were sought. I tried ribbon, but this was very difficult to work with, so I switched to wool. This worked quite well. It was soft and thin enough to present little obstacle to sliding the work from hook to cord, and had the high friction that proved useful with the shoelace. Being wool, it does have many fine fibres, which tend to combine with the fine fibres of the wool I'm working, so it can be difficult not to knit the cord as well. There's room for improvement, but the wool 'cord' will do for now.

Hook made from holly twig, with actual knitting!

So how did the home made hook fare? Well, I started using it as soon as I'd finished carving it, which was probably a mistake as it was still a little sticky with sap. Also, the hook end tended to fray a bit as it was pushed against the wool. I trimmed it with the knife a couple of times, then it stopped fraying. As it dried, the hook became smoother as well, and quite easy to use. The eye broke, as expected, so I trimmed the end and cut another, which is holding up well so far.

As for the craft of knooking, I had progressed to a stocking stitch square, which meant that I was learning a new stitch (purl is more difficult than the knit stitch in knooking, unlike knitting) with a new hook and new cord – not the best combination. It was very difficult to start with, but as the hook dried out and I learnt to make the stitches looser, it got easier.

After a few rows, I got the knack of holding the wool so that all the movement is done with the hook (as opposed to pushing the hook through then moving the wool around it) for the knit rows. Towards the end of the piece, I learnt to do the same for the purl rows (more difficult as the wool then obscures the working hook, so I can't see what I'm doing). This makes the action less clumsy and more fluent, and altogether more pleasing. In time, I'm sure it will enable me to speed up as well.

All in all, a very successful experiment. I'm enjoying knooking and have completed a square of stocking stitch, which is not bad for a bit of twig from the garden.

Chickens

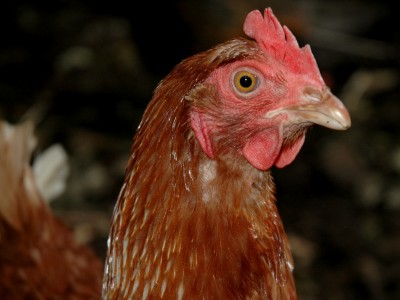
Many of our friends, when we talk to them about our self-sufficiency project, seem to expect/want/insist that we keep chickens. We're not sure why this is. It's as if the concept self-sufficient includes chicken-keeping as a defining feature and the idea of doing one without the other is incomprehensible.


Chicken pic borrowed from Lousia

So do we want to keep chickens? Well, no. The conversation with enthusiastic friends goes like this, You must keep chickens. But we don't eat very many eggs. You can find lots of uses for eggs if you put your mind to it. Let's just follow the logic there. Our hypothetical chickens are producing more eggs than we want, so we have to find new ways of using the eggs. Remind me why we're getting the chickens, again?

Another line is, “Eggs are very useful for trading.” At this point I explain that my aim is to provide for our own needs, not to be a farmer. For some people swapping eggs for other goods is so different from selling them that this distinction is difficult to get across. Maybe bartering is also an essential part of their self-sufficiency concept.

Friends who keep a few chickens themselves can be very enthusiastic about how much fun they are to have around. I've no doubt this is true, but this is very much treating the birds as pets. I don't have a problem with this, but we have one cat, who causes quite enough trouble on her own, and we can't afford to keep any more pets.

Economically, there's no case for keeping chickens for the eggs. They need housing, fencing in and feeding, all of which costs money. If we got quite a few birds, we might sell enough eggs to cover the costs, but that would be farming which, as I've already mentioned, is not really what this is all about.

There's also the question of what happens when they get old and stop laying. From a farming point of view, the sensible thing to do would be to kill them for meat (though the meat from such birds isn't terribly good) but I'm sure if I kept chickens they'd be pets by that time, and I just couldn't bring myself to kill them, so they'd continue their lives as pets, needing feeding and looking after, not producing any eggs at all.

I can see good reasons for other people to keep chickens, as pets and for extremely fresh eggs, but not for us. Ian doesn't even like eggs.

Knitting ==> Knooking

The knitting's going OK. I've picked it up often enough, and managed to knit fast enough, that I get a sense I'm making progress. Let's be clear about this: My criterion for adequate progress is to be in with a chance of getting a small, simple baby blanket finished before the baby is born in April. I try to set acheivable goals.

So, it's going OK, but it still feels clumsy and awkward. Although I've now finished the pink wool and have four pieces of knitting - I won't call them squares because they're a range of shapes, though all vaguely rectangular - I haven't yet got the knack of knitting fluently. I start to wonder whether I might prefer crochet instead, but having started a knitted blanket I intended to finish it as such.

In my wanders around cyberspace I came across the very readable blog of the Gingerbread Lady and was delighted to learn that I was not alone in my childhood hang-ups about knitting. In fact, there seem to be quite a lot of us who've been convinced that we're doing it wrong and consequently rather gone off the whole business. Why does it have to get so emotional? It's just wool, after all.

One of the comments on Gingerbread Lady's post said,
"As for the knitting, have you heard of knooking? It's a way to actually make a knit fabric (not a knit look-alike) using a modified crochet hook."
Aha! Knitting with a crochet hook? That has to be worth a little investigation.

One google search led me to an entire blog dedicated to introducing the technique. The tool used is a crochet hook with a cord attached to the end, either threaded through a needle eye or attached in some other way. Knooking is quite new, so these corded hooks are not widely available, but commenters on the blog mentioned making their own using tape, or in one case modifying a wooden crochet hook using needle files and a small drill bit.

Making my own knooking hook would have the advantages of being able to try the technique without spending any money, and being able to get started straight away. I went to the cupboard where odds and sods live (as if I keeep all my random crap in one place!) in search of shoelaces, and found some very fine washing line, which I thought might be even better, being a little rigid and smooth like a knitting needle. I taped this to the end of a crochet hook and had a go at some garter stitch.


Rather poor photo of cobbled together knooking hook.
Try to ignore the carpet behind it. We do.

The washing line contraption was fine, but rather slippery. The stitches tended to slide along it, spreading out and shrinking as they went. After half a dozen rows or so, I reverted to Plan A and tried the shoelace instead. This was better; the greater friction was definitely an improvement. Though this was only a cobbled together contraption, I managed to get almost to the end of a knitted square before the tape tore, leaving me with several dropped stitches in the middle of the last row - not catastrophic as the hook alone would be fine for finishing off the piece.

The temporary hook had lasted long enough for me to try out the new technique and you know what? I enjoyed it much more than knitting. Part of the reason is simple; it's much harder to drop stitches when knooking. There's only one working needle and it has a hook on the end of it, so stitches are much less inclined to slide off. Even if a stitch is dropped (and I am capable of this) or a mistake is made, the previous row is kept on the cord even after the current row is knitted (knooked?) so backtracking a few stitches is a simple matter and there's no danger of laddering (I should say little danger - it is possible if a dropped stitch goes unnoticed for a couple of rows).

There's more to it than this, though. I'm not sure why, but I find I enjoy the process more. It's hard to explain, because I'm no more fluent, but the action is more pleasing to me. Maybe I'm just naturally suited to the crochet hook and not the knitting needle. Who knows. Whatever the reason, it's knooking from here on!

Wednesday, 2 February 2011

Ordering seeds

As I may have mentioned before, I find the garden a bit daunting. Luckily, we moved in the autumn, so I've had the whole winter to get my head round the idea of planning and managing an entire veg garden that's supposed to be making a very significant contribution to our food requirements next year. In the past, I've only had small plots with no ambitions whatsoever, so questions of 'How much do we need?' never came up.

I made a start, back in November, by listing all the plants I thought I might want, divided into big trees, small trees, other fruit, herbs, vegetables and flowers. This took up the back of a very large envelope, and has proved useful. Leaving it for a while has helped crystalise choices over the 'maybe' veg, though this may have been influenced by what was in season at the time (yes to celery, no to sweetcorn. I had a craving for celery in December - no idea why).

I also had time to get to know the garden and think about where I might put things, and concluded that I have space for two big trees at most, so that'll be one chestnut and one walnut, then. Unfortunately, decisions about where to put smaller plants sent me into a blithering fuzz of confusion. I've earmarked the largest of the lower beds for potatoes, and planned a row of sunflowers and asparagus along the back (highest) fence, but apart from that I still don't know where I'm going to put things. I'll come back to that, I think.

In the meantime, I needed to order seeds. I felt it was time to move on from the back of an envelope (though it is a very large envelope, I'm bound to lose it at some point) so I made myself a nice new spreadsheet. It has columns for type of plant, seeds/bulbs/plants/etc, how many, cost, source and date, dates sown and harvested, and notes. Surely such a spreadsheet should set me up for a productive veg garden!

Next, I started entering details of seeds I already have (still no ordering, you notice), which gave a satistfying ten rows of vegetables, mostly thanks to some free seeds that came with 'Grow It' magazine (which was also free, thanks to friends at the publisher. Shhh, don't tell anyone).

Having made a start on the spreadsheet, I finally felt up to the challenge of placing an order! I started with potatoes, having found a potato specialist, JBA. I'd done a rough calculation and thought I'd need 100 plants for maincrop plus some new potatoes, but they have a very useful calculator on their site to tell you how many plants you actually have space for. I'd been wondering whether to devote all or just half of the big bed to spuds, so entered the dimensions of the whole bed, which turns out to be enough for fifty plants. That'll be why people say potatoes take up too much space to be worth it. Hmm. Fifty it is then... well fifty maincrop plus 25 new. I don't suppose I'll actually space them out as much as you're suposed to...

Next stop was the Real Seed Catalogue because I like their style. They strongly encourage gardeners to save their own seeds, and provide instructions on how to do so. They also offer a fairly small range of selected vegetables, which makes it much easier to choose! I went through the list on the envelope and ordered as many of the herbs and veg as I could, though I think I may have already left it a bit late in the year, as their parsnips were listed as being available for autumn 2011. I didn't order those.

Finally (I assumed), I turned to Seeds by Size which, last time I ordered from them, seemed to be run single handedly by a Mr John Size. He has no pretty pictures on his website, variable levels of detail in his descriptions, and can't handle online orders, but appears to have absolutely any type of seed you could think of. At the moment, though, his flower section is out of action, so I had to take a detour to find sunflower seeds.

My reason for growing sunflowers is to extract oil from them. I covet a Piteba oil press and if I'm to justify buying one, I'd better have an oil crop in the garden, rather than relying on foraged beech nuts, whose oil I've never even used before. The Piteba website helpfully informs me than for sunflower oil you need the variety with black seeds, not the stripy ones. I find that people selling flower seeds will tell you a lot about the colours of the petals, but don't tend to mention the colours of the seeds. However, people selling sunflower seeds for feeding wild birds do specify the colour, as apparently black seeds are also better bird food, presumably also due to the higher oil content. Bird food comes in quite large bags, or at least, smaller bags aren't very much cheaper than the big ones, so you might as well buy more. Five kilos seemed to be the smallest quantity available before the price per kilo started shooting up, so that's what I bought. They arrived the next day, so I have them sitting in the hallway now. Five kilos of sunflower seeds is a lot. I don't think I'll sow them all.

Returning to Seeds by Size, I almost got to the end of my list. They even sell sugar beet seeds, which are hard to obtain in less than agricultural quantities anywhere else (I noticed that jam and wine making use a lot of sugar, so I'm going to try growing my own). Providing they have all my seeds available (they ask you to check before ordering), the only thing left apart from trees is the French Tarragon. Apparently it's not possible to grow this from seed, so all they have available is Russian Tarragon. I bought this last time I ordered from them and it really doesn't taste the same, so I'll have to buy a plant from somewhere else, possibly the same place that I buy fruit trees from.

Just in case you're interested, my final list of veg and herbs looks like this:

Asparagus (seeds collected from a plant in the garden. Not the usual way to grow asparagus, but there are plenty of them)
Garlic 1 (tiny bulbules saved from a plant in the garden. These will take two years to grow)
Garlic 2 (ordinary cloves given to me by my dad, who wasn't terribly impressed by the bulbules)
Onions 'Bedfordshire Champion' (bought from Focus and sown in trays in the greenhouse, because they need sowing now-ish)
Aubergine 'Black Enorma' (freebie)
Chilli 'Numex Twighlight' (freebie)
Gherkin 'Parisian Pickling' (freebie)
Tomato 'Roma' (freebie)
Tomato 'Tamina' (freebie)
Tomato ? Cherry (seeds saved from tomatoes I bought for eating)
Pea 'Little Marvel' (very old seeds)
Pea 'Little Marvel' (seeds saved from plants grown from the very old seeds)
Chives (old seeds)
Potatoes – Desiree (I went for names I recognised here)
Potatoes – King Edward
Potatoes – Foremost

From the Real Seed Company:-
BroadBean (Aquadulce Longpod)
Carrot (Long Lisse de Meaux)
Brocolli (Early Purple Sprouting)
Cabbage (Rouge Tete Noir )
Celery (Full White)
Fennel (Mantovano)
Basil (Genovese sweet basil)
Frise Parsley
Leek (Long de Meziers)
Squash (Burgess Vine Buttercup)

Sunflowers – black seed (bird food from Vine House Farm)

From Seeds by Size, hopefully:-
Sugar beet blend
Parsnip 'Tender and True'
Peas 'Greenshaft (Hurst)'
French beans 'Cannellino'
Runner beans 'Painted lady'
Oregano Italian
Thyme English broad leaf

All I have to do now is figure out where to put them and plant them all!

Thursday, 27 January 2011

Hair update

I don't want to tempt fate (wot me? Superstitious? Never!) but I think my hair is less oily than yesterday. It still looks like it needs a wash, but... just maybe... it might have turned the corner.

Wednesday, 26 January 2011

Saving tomato seeds

It turns out that saving tomato seeds is not simply a matter of taking the seeds out of the tomato and spreading them out to dry. The issue is the protective jelly that surrounds each seed. In the wild, tomatoes fall to the ground, rot, and the seeds are left free of jelly and ready to germinate. With the jelly in place, there's no germination.

I'm planning on buying tomato seeds anyway this year, but I had a recipe that involves scooping out the seeds and middle bits from cherry tomatoes. I say recipe... I saw cherry tomatoes stuffed with cheese in Waitrose and thought, "They look nice." I did it for a party. It was a fiddle, but they were indeed nice, and I had all the seeds and pulp left over. Shame to waste them, so I put them in a pot with some water, as per instructions, and left them on the side in the kitchen.


Tomato seeds. In pot. With water.

Then I waited for the mould to appear. They smelled bad - not excruciatingly bad, but fairly unpleasant - and a few bubbles were spotted, but no mould. Today, finally after two weeks, the first sign of something that might be mould on the surface. I have never been so happy to see something going mouldy in the kitchen!

Now, looking back at the instructions, I see that I should have only given it three days (in a warm place. I don't have a warm place) and I should have waited for mould or bubbles. Oops, I had bubbles. Time to rescue the seeds, I think! Either I'll dry them for planting in a month or so, or if they're germinating I'll have to plant them straight away. Then I'll just have to find somewhere warm for them until the weather picks up.

Tuesday, 25 January 2011

Knitting

I learnt to knit when I was about ten, and a few of my school friends did too. One day, my mum offered to help me, but was bemused by the way I was doing it - putting the needle into the back of the stitch instead of the front. She told me that would result in twisted stitches and I should change it. I found it difficult to change, got frustrated and cross, and resolved to keep doing it my way, without her help.

The school craze for knitting didn't last long, and although I always intended to come back to it someday, I was left with the feeling that I was doing it wrong and would have to unlearn what I knew then start again from scratch if I was ever to knit the way Mum did, i.e. fast.

Recently I decided that the time had come to get over that barrier and learn to knit again. During the house move I'd uncovered a lot of old children's books, including the Usborne guide to knitting, which seemed like a good place to start teaching myself the basics. I opened the book and, clear as anything, the picture showed the needle going into the back of the stitch. I was vindicated!

My sister is due to have her first baby this spring and baby clothes, being small, seemed a good project to start on. When I suggested this idea to her, she made it clear that hand-knitted clothes made by an aunt who's just learning to knit were not quite what she had in mind for her baby. She did suggest a blanket made of knitted squares, which I have to admit is much more sensible. That's the trouble with my sister - she's bossy, but she's always right!

Don't ask how I came by that ball of pink wool - it was just in a drawer, OK?

I decided to try different stitches for the different squares, and started with the most basic, garter stitch, knitted MY way. It came out fine, and I moved onto stocking stitch; alternating rows of the two basic knitting stitches, knit and purl. I found that following a row of purl, it's the front, not the back, of the stitch that presents itself most naturally to the needle, so I switched to putting the needle into the front of the stitch. Easy. It really isn't the big deal it was when I was ten.

Monday, 24 January 2011

Not washing hair

I'd heard a long time ago that if you leave your hair alone for long enough it will revert to a natural state of looking after itself with no need for shampoo. The theory is that shampoo strips the natural oils from hair, so the scalp compensates by producing more oils than it would otherwise, so you have to shampoo them out, and so on... This makes sense to me - after all, my cat has a lovely soft coat without using any shampoo and I'm sure all that 'washing' she does is really just combing.

No shampoo here, and just look at how fluffy that tummy is!

The idea of not having to wash my hair has always appealed to me and if I don't use shampoo that's one more thing (two counting the conditioner) that I don't need to buy. A little research revealed that yes, people do this - it's not just an urban myth. A Daily Mail article was particularly interesting (yes, really!) They asked five women to stop washing their hair for six weeks. Three of them found the experience a revelation - their hair looked and felt much better and they saved a lot of time and money. The other two were utterly miserable - their hair just got greasy and horrible. So, it doesn't work for everyone, which was news to me, but I noticed that the three who got on well with it were brunettes whilst the two who didn't were blonde. It's far too small a sample to generalise, but I found this encouraging nonetheless.

I found a blog entry that gave guidelines on how to manage the transition from daily washing to not washing. Step one: reduce washing frequency - well I washed every other day to start with, so that didn't really apply to me. Step two: switch from normal detergent-based shampoo to soap-based shampoo. Now, my friend Amanda at Realize Beauty has explained at great length why soap is not good for washing hair, but I tried it anyway. Amanda was right: Soap left icky gunk in my hair. Step three: switch to baking soda in water followed by a vinegar rinse. Well, I'd tried baking soda once before and found it really harsh on my hair, so I wasn't too keen to try that again. Step four: finally, stop washing hair altogether. Hmm, I seem to have rejected all the interim steps, so I'll just have to go straight to not washing and put up with the yucky transition period.

I wasn't sure whether not washing meant not even wetting the hair or continuing to rinse regularly with water. I did once try water-only washing, or at least just a herbal rinse, and that was horrid. It left my hair wet AND greasy. Also, I can't really see how water alone's going to tackle oily hair - washing oil off hands with just water doesn't work, so why would I expect it to for hair? Therefore, my no-washing experiment will involve going straight from washing with ordinary shampoo (and quite harsh shampoo at that, because we bought a cheap brand) to not washing, or even wetting, at all. This is not going to be pretty.

Following the Daily Mail article, as well as what I heard years ago, I'm going to give it six weeks. If I'm not happy with my hair at the end of that I'll go back to washing it, as infrequently as I can get away with. I'm almost two weeks into the experiment now, and no, it isn't pretty. Having said that, it seemed to stabilise after about five days and hasn't been getting any greasier since then, so I think my scalp must have already reduced its oil production. The trouble is, my hair is still full of oil.

I know that lots of brushing is an important part of this not-washing business (just look at the cat) and natural bristle brushes are recommended. I'm not sure how seriously to take this recommendation, as it tends to be wrapped up in a "Natural = good, Synthetic = bad" philosophy, which I find rather simplistic. Some people say natural bristles are less likely to break the hair than plastic ones, which I can't believe because you only have to look at the brushes to see that the bristles are similar hardness. I also find natural bristles rather scratchy on my scalp whereas the bobbles on the end of the plastic bristles massage quite pleasantly. On the other hand, natural bristles are more tightly packed in the brush, so I can see they're probably better at carrying the oils down the length of the hair, but then a comb has the same feature. What it really comes down to is the fact that I already own a plastic brush and I don't have a natural one. I'll stick with what I've got, but use a comb as well.

At this stage, Ian and I are both getting pretty fed up with my unwashed hair (though he's being supportive - he might even try it himself if it works for me). It doesn't look too bad, it just doesn't look particularly nice either. This morning I started wondering about the dry shampoos I've heard about - essentially they just absorb the oil and you brush them out. I tried brushing through a little bicarb - only about a teaspoonful - and I think it reduced the oiliness a little, but I'm not entirely convinced. My hair still feels sticky and I'm getting obsessed with brushing and combing it. Sitting here writing a blog entry isn't helping the obsession, either! I've also found that some people take this very seriously indeed. I do not intend to care that much about my hair!

I'll stick with it for six weeks because really, it's not all that long. At two weeks, though, I'm not enjoying this very much.

Tuesday, 18 January 2011

Wood store

Our heating project included grand plans for a woodstore. With a south-facing gable end, that was the obvious place to put the solar panels, but not flat to the wall. They'll be more efficient if they're propped out from the wall on a porch roof type arrangement (I've since discovered that this is quite normal, and known as an A frame). If we're having a porch roof against that wall, what better place to store wood than underneath it? Therefore, we'd build a nice, strong, well-supported roof and store wood underneath it.

The trouble with this plan is that it's quite a big project, and I'm not really sure how to do it. In the meantime, we need somewhere to store wood. Focus has wood stores on sale for £70, which is probably as much as we'd spend on wood and bits if we started from scratch. We gave in and bought it. I should say I gave in. I'm not sure Ian was that keen on the Grand Project in the first place - it was him who suggested the Focus one.
Woodstore, not actually big enough to take a full load of wood

We did have to screw the thing together, so there was some satisfaction from building something, and now we actually have somewhere to keep the wood, not just plans for something bigger and better that might get built one day, maybe...